Introduction
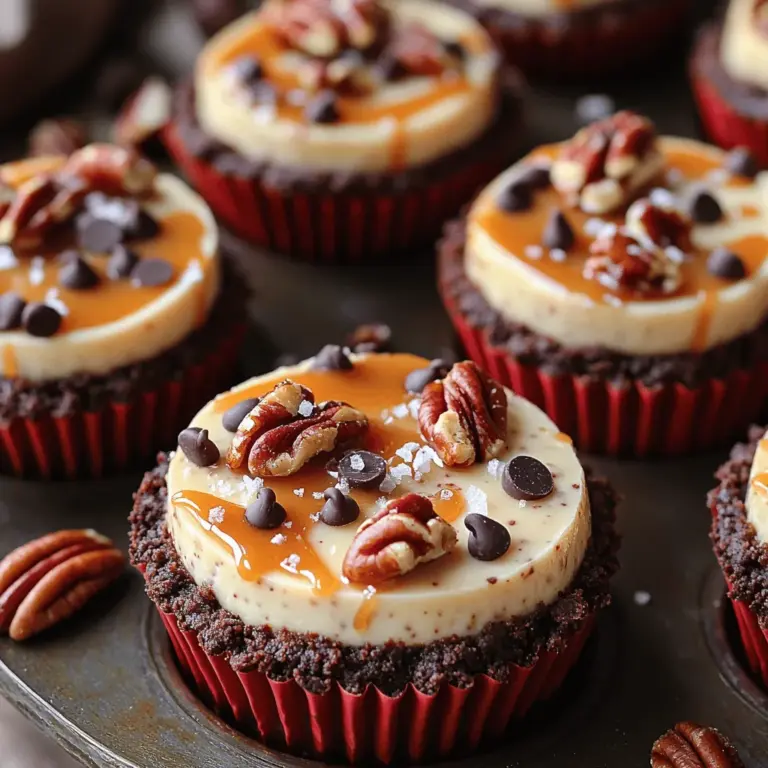
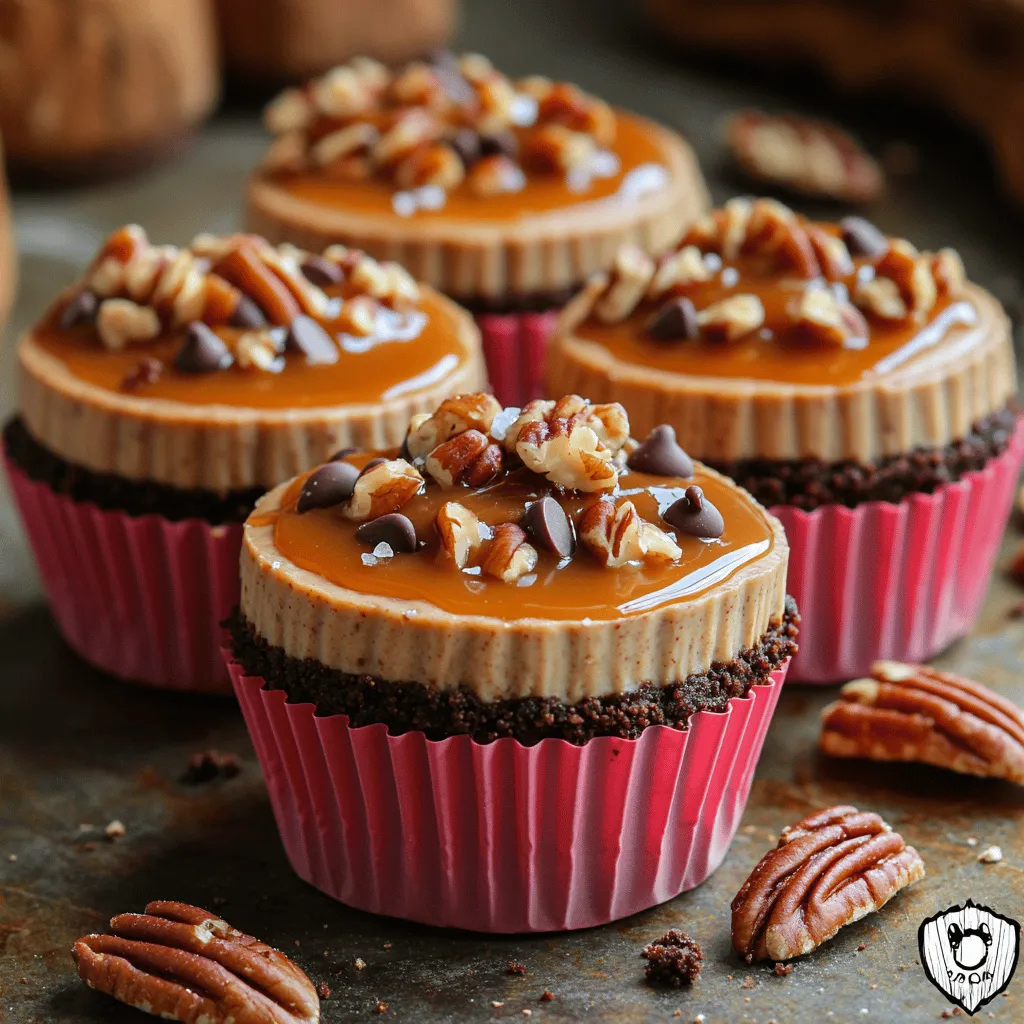
Are you ready to indulge in a dessert that combines the rich flavors of chocolate, caramel, and pecans without needing to turn on your oven? Look no further than these decadent no-bake turtle mini cheesecakes. Perfect for any occasion, these delightful treats are a fantastic way to satisfy your sweet tooth without the fuss of baking. They offer a luxuriously creamy cheesecake filling nestled in a buttery crust and topped with a luscious layer of caramel and crunchy pecans.
No-bake desserts have surged in popularity in recent years, especially among home bakers looking for quick and easy solutions to create impressive treats. They save time, eliminate the need for baking skills, and allow you to whip up something special in a fraction of the time. Whether you’re hosting a party, celebrating a birthday, or simply treating yourself, these no-bake turtle mini cheesecakes are sure to impress.
At the heart of this recipe are the standout ingredients that contribute to its unique flavor profile. The combination of smooth cream cheese, sweet caramel, rich chocolate, and crunchy pecans creates a symphony of tastes and textures that are simply irresistible. As we delve into the process of creating these mini cheesecakes, you’ll discover just how easy it is to bring this delectable dessert to life.
Understanding the Components of Turtle Mini Cheesecakes
To appreciate the decadence of turtle mini cheesecakes, it’s essential to understand the classic “turtle” dessert concept. Named for its resemblance to the beloved turtle candies, which feature chocolate, caramel, and nuts, this dessert brings together these flavors in an elegant cheesecake format. The result is a dessert that’s not only visually appealing but also a delight for the palate.
Flavor Profiles: Chocolate, Caramel, and Pecans
The hallmark of turtle desserts lies in their harmonious balance of flavors. The rich chocolate base serves as a decadent foundation, while the smooth caramel drizzle adds a touch of sweetness and a hint of chewiness. The crunch of pecans introduces an unexpected texture that elevates the dessert to new heights. Together, these components create a blissful experience with each bite, making it difficult to resist reaching for just one more.
Benefits of Using No-Bake Methods in Dessert Preparation
One of the most appealing aspects of making no-bake desserts is the simplicity they offer. No-bake methods eliminate the need for an oven, which not only saves energy but also allows for a more relaxed cooking experience. This is especially beneficial during hot summer months when turning on the oven can make your kitchen uncomfortably warm.
Additionally, no-bake desserts often require fewer steps and less equipment, making them accessible for bakers of all skill levels. You can create stunning, restaurant-quality desserts in your own kitchen without the fear of baking mishaps. The ability to prepare these cheesecakes ahead of time also means you can spend more time enjoying your gathering and less time worrying about last-minute kitchen chaos.
Creating the Perfect Crust
A cheesecake’s crust is more than just a base; it provides the structure and texture that complements the creamy filling. A well-prepared crust enhances the overall flavor and adds an essential crunch that balances the softness of the cheesecake. In this recipe, we will focus on crafting a rich, chocolatey crust that perfectly pairs with the turtle cheesecake filling.
Ingredients for the Crust
To create the ideal crust for your turtle mini cheesecakes, you’ll need the following ingredients:
– Graham cracker crumbs: This is the primary ingredient for our crust, providing a sweet and slightly nutty flavor.
– Cocoa powder: By incorporating cocoa powder, we enhance the chocolate richness of the crust, aligning it perfectly with the cheesecake filling.
– Granulated sugar: This ingredient adds a touch of sweetness to the crust, balancing the flavors and complementing the cheesecake.
– Unsalted butter: Melted butter acts as a binding agent, bringing all the crust components together while adding a rich, buttery flavor.
Step-by-Step Guide to Preparing the Crust
1. Combine the dry ingredients: In a medium mixing bowl, combine 1 cup of graham cracker crumbs, 1/4 cup of cocoa powder, and 1/4 cup of granulated sugar. Use a whisk to ensure everything is evenly distributed.
2. Add the melted butter: Melt 1/2 cup of unsalted butter in the microwave or on the stovetop. Once melted, pour the butter into the dry ingredients. Mix until all the crumbs are well-coated and the mixture resembles wet sand.
3. Press the crust into muffin tins: To create mini cheesecakes, use a standard muffin tin. Line the tin with cupcake liners for easy removal. Take about 2 tablespoons of the crust mixture and press it firmly into the bottom of each liner, ensuring an even layer.
4. Achieve optimal texture: To ensure that the crust holds together well, use the back of a measuring cup or a small glass to press the mixture down firmly. You’ll want a solid base that can support the cheesecake filling.
5. Chill the crust: Place the muffin tin in the refrigerator for about 15-20 minutes to allow the crust to set. Chilling helps the butter firm up, giving the crust its structure.
Tips for Pressing the Crust Evenly in Muffin Tins
– Use a measuring cup: A flat-bottomed measuring cup makes it easy to evenly distribute the crust mixture into each muffin cavity.
– Be thorough: Make sure to press down firmly and evenly to avoid any crumbling when you remove the cheesecakes later.
– Keep it consistent: Aim for the same thickness across all crusts for uniformity in baking and presentation.
With the crust ready, you’re one step closer to creating these delightful turtle mini cheesecakes. Next, we will focus on crafting the luxurious cheesecake filling that will elevate this dessert to new heights.
Crafting the Cheesecake Filling
The cheesecake filling is the star of the show in this recipe, providing a creamy and indulgent texture that will leave your taste buds yearning for more. A successful cheesecake filling relies on a few key ingredients that work together to achieve the perfect balance of flavor and consistency.
Key Ingredients for the Cheesecake Filling
1. Cream cheese: The base of our cheesecake, cream cheese provides a rich and creamy texture that is essential for this dessert. Be sure to use full-fat cream cheese for the best flavor and richness.
2. Powdered sugar: To achieve the right level of sweetness, powdered sugar is the preferred choice. It blends smoothly into the cream cheese, ensuring a velvety finish without any gritty texture.
3. Vanilla extract: A splash of vanilla extract adds depth of flavor to the cheesecake, enhancing the overall taste experience.
4. Heavy whipping cream: This ingredient is crucial for creating a light and airy texture in the cheesecake filling. Whipping the cream until stiff peaks form will give the filling its fluffy consistency.
Instructions for Preparing the Cheesecake Filling
1. Soften the cream cheese: Before mixing, allow the cream cheese to sit at room temperature for about 30 minutes. Softening it will make it easier to blend smoothly with the other ingredients.
2. Mix the cream cheese and powdered sugar: In a large mixing bowl, combine 16 oz of softened cream cheese and 1 cup of powdered sugar. Use an electric mixer on medium speed to beat the mixture until creamy and well combined, about 2 minutes.
3. Add the vanilla extract: Pour in 1 teaspoon of pure vanilla extract and mix on low speed until fully incorporated.
4. Whip the heavy cream: In a separate bowl, use an electric mixer to whip 1 cup of heavy whipping cream until stiff peaks form. This step is crucial for achieving a light and fluffy filling. Be careful not to over-whip, as this can lead to a grainy texture.
5. Fold in the whipped cream: Gently fold the whipped cream into the cream cheese mixture using a spatula. This technique helps maintain the airy texture of the whipped cream while ensuring the filling is light and creamy.
With the cheesecake filling prepared, you are now ready to assemble the mini cheesecakes. The combination of the rich crust and the luscious filling will create a dessert that is not only visually stunning but also a true delight for the senses. Get ready to layer the flavors and make these turtle mini cheesecakes a showstopper for your next gathering!
Folding Methods to Maintain Airiness
When preparing the cheesecake filling for your No Bake Turtle Mini Cheesecakes, it’s crucial to maintain the light and airy texture that makes these desserts so delightful. Folding is an essential technique used to combine ingredients without deflating the air that has been incorporated into the mixture, particularly when working with whipped cream or whipped egg whites. Here are a few tips for effective folding:
1. Use a Rubber Spatula: A rubber spatula is ideal for folding because its flexible edge can reach all corners of the bowl, ensuring even distribution without overmixing.
2. Gentle Motion: Start by cutting down through the center of the batter with the spatula, then gently lift and fold the mixture over itself. Rotate the bowl a quarter turn after each fold to ensure uniform incorporation.
3. Stop When Combined: It’s important to stop folding as soon as the mixture is combined. Overmixing can cause the filling to lose its airy texture, resulting in a denser cheesecake.
Assembling the Mini Cheesecakes
Now that your cheesecake filling is ready, it’s time to assemble the mini cheesecakes. Follow these steps to fill the crusts:
Steps for Filling the Crusts with Cheesecake Mixture
1. Prepare Your Muffin Tins: Ensure that your mini cheesecake crusts are completely cooled. If you’ve used muffin liners, this will make it easier to remove the cheesecakes later.
2. Fill the Crusts: Using a piping bag fitted with a large round tip or a spoon, carefully fill each crust with the cheesecake mixture. If using a spoon, scoop out a generous amount and carefully drop it into the crust, allowing it to mound slightly.
3. Smoothing the Tops: After filling, use the back of a spoon or an offset spatula to smooth the tops of the cheesecakes. A smooth surface not only looks appealing but also provides a better base for the toppings that will follow.
Tools and Techniques for Piping or Spooning the Filling
– Piping Bag: For a neater application and more control, a piping bag is recommended. Fill the bag with the cheesecake mixture, twist the top closed, and pipe directly into each crust. This technique minimizes mess and allows for precise filling.
– Offset Spatula: If you choose to spoon the filling, an offset spatula can help smooth the top effectively. The flat blade can glide over the surface, providing an even finish.
Adding the Turtle Topping
The turtle topping is what truly elevates these mini cheesecakes, adding layers of flavor and texture. Here’s how to prepare and apply the topping:
Description of the Turtle Topping
The classic turtle topping consists of three key components: rich caramel, crunchy pecans, and silky chocolate. This combination creates a decadent contrast to the creamy cheesecake filling.
Ingredients for the Topping
– Caramel Sauce: You can opt for store-bought caramel sauce for convenience or make your own for a personal touch. If making homemade, ensure it’s cooled before drizzling.
– Chopped Pecans: Use fresh pecans, roughly chopped, to add a nutty flavor and delightful crunch. Toasting the pecans before use can enhance their flavor profile.
– Semisweet Chocolate Chips: These chips provide a rich, chocolatey finish that balances the sweetness of the caramel.
How to Layer the Toppings for Visual Appeal
1. Drizzle the Caramel: Begin by drizzling the cooled caramel sauce over the top of each filled cheesecake. Use a spoon or squeeze bottle for precision. Allow some of the sauce to drip down the sides for a rustic look.
2. Sprinkle the Pecans: After drizzling the caramel, sprinkle the chopped pecans over the top. This adds texture and visual interest to your mini cheesecakes.
3. Chocolate Drizzle: Finally, melt the semisweet chocolate chips in the microwave in 15-second intervals until smooth. Use a fork or piping bag to drizzle the melted chocolate over the toppings in a zigzag pattern for an elegant finish.
The Setting Process
Once assembled, the mini cheesecakes need time to chill and set properly to achieve the ideal texture.
Importance of Chilling the Mini Cheesecakes
Chilling is a critical step that solidifies the filling, making it easier to remove from the muffin tins and ensuring it holds its shape when served.
Recommended Chilling Times for Optimal Texture
– Minimum Chill Time: Ideally, allow the cheesecakes to chill for at least 4 hours. This time allows the filling to firm up adequately.
– Overnight Chill: For the best results, consider chilling them overnight. This extended time not only sets the texture but also allows the flavors to meld beautifully.
How the Setting Process Affects Flavor Development
Chilling helps the flavors develop and intensify, resulting in a more harmonious taste. The cold texture also provides a refreshing contrast to the rich toppings, making every bite a delightful experience.
Serving Suggestions and Presentation
When it’s time to serve your No Bake Turtle Mini Cheesecakes, presentation is key.
Tips for Removing Mini Cheesecakes from Muffin Tins
– Gentle Removal: If you used muffin liners, simply peel them away from the cheesecakes. If they are not lined, gently run a butter knife around the edges before lifting them out with a small spatula.
– Serve Chilled: Always serve mini cheesecakes chilled. This enhances their creamy texture and flavor.
Ideas for Garnishing and Presenting the Cheesecakes
– Garnish with Whipped Cream: Add a dollop of freshly whipped cream on top of each cheesecake for an extra touch of elegance.
– Chocolate Shavings: Consider adding chocolate shavings or curls on top of the whipped cream for an appealing finish.
– Fresh Fruit: For a pop of color, garnish with fresh berries or slices of banana, which can complement the rich flavors of the cheesecake.
Pairing Suggestions: Beverages That Complement the Flavors
– Coffee: A cup of brewed coffee enhances the dessert experience, as the bitterness balances the sweetness of the cheesecakes.
– Dessert Wine: A sweet dessert wine, such as a late harvest Riesling, pairs wonderfully with the richness of the turtle toppings.
– Milk: For a classic pairing, serve with a glass of cold milk, which complements the creamy texture and sweetness of the cheesecakes.
Nutritional Insights
Understanding the nutritional aspects of your indulgent dessert can help you enjoy it in moderation.
Breakdown of Nutrition per Serving
While exact nutritional values can vary based on specific ingredients and portion sizes, here’s a general overview per mini cheesecake:
– Calories: Approximately 220-250 calories
– Fat: 15-18 grams
– Carbohydrates: 22-25 grams
– Protein: 3-4 grams
Discussion on Indulgence and Moderation
These No Bake Turtle Mini Cheesecakes are indeed a treat, and enjoying them occasionally can fit well into a balanced diet. Remember, portion control is key when indulging in rich desserts. Sharing is also a great way to enjoy without overindulging.
Conclusion
In summary, creating No Bake Turtle Mini Cheesecakes is not just about following a recipe; it’s about enjoying the process of making a decadent dessert that brings joy to any occasion. The layers of creamy cheesecake, rich caramel, crunchy pecans, and silky chocolate provide a delightful experience for the taste buds.
Don’t hesitate to experiment with variations—perhaps try different nuts, flavored toppings, or even a fruity cheesecake base. The joy of homemade desserts lies in creativity and personal touches. So, gather your ingredients, embrace the no-bake simplicity, and indulge in the pleasure of crafting these delightful mini cheesecakes that are sure to impress family and friends alike.
