When it comes to comfort food that pleases a crowd, crispy ranch chicken tenders stand out as a quintessential choice. This delectable dish melds the satisfying crunch of a perfectly fried exterior with the tender juiciness of chicken, all enhanced by the rich, herby notes of ranch seasoning. Whether you’re preparing a casual family dinner, hosting a game-day gathering, or seeking a quick snack, these chicken tenders are not only easy to whip up but also offer a mouthwatering experience that appeals to taste buds of all ages.
The allure of chicken tenders lies in their versatility. They can be served as a main dish alongside your favorite sides, tossed into salads, or even enjoyed as finger food at parties. The crispy ranch chicken tenders recipe is particularly popular because it combines familiar flavors with a twist, making it a go-to favorite that resonates with both children and adults alike. The ease of preparation ensures that even novice cooks can achieve restaurant-quality results at home, making it a beloved staple in many households.
Understanding the Ingredients
To create the perfect crispy ranch chicken tenders, understanding the ingredients is crucial. Each component plays a significant role, contributing to the overall flavor, texture, and juiciness of the dish. Let’s delve into the essential ingredients that come together to create this mouthwatering recipe.
Chicken Tenders: The Foundation of Flavor
At the heart of this recipe are the chicken tenders themselves. Known for their tenderness and quick cooking time, chicken tenders are the ideal choice for achieving that sought-after crispy exterior while keeping the meat juicy and flavorful. When selecting chicken tenders, opting for fresh or properly thawed chicken is essential. Fresh chicken tends to have a better texture and flavor, while thawed chicken should be handled with care to maintain its quality. The beauty of chicken tenders lies in their convenience; they require minimal preparation and are ready to be transformed into a delicious meal in no time.
Buttermilk: The Secret to Juiciness
One of the key ingredients in this recipe is buttermilk, which serves as a marinating agent for the chicken. The acidity of buttermilk works wonders by tenderizing the meat, resulting in a juicy and flavorful final product. By soaking the chicken tenders in buttermilk prior to breading, you allow the flavors to penetrate deeply into the meat while also ensuring that it remains moist during cooking. This step is crucial for achieving that desirable contrast between the crispy coating and tender chicken inside.
Ranch Seasoning: A Flavorful Twist
Ranch seasoning is a standout component of this dish, providing a distinctive flavor that elevates the chicken tenders beyond the ordinary. A blend of herbs and spices, ranch seasoning typically includes ingredients such as dried dill, parsley, garlic powder, onion powder, and black pepper. This combination not only enhances the taste of the chicken but also adds a delicious aroma that fills the kitchen as they cook. The versatility of ranch seasoning allows it to pair well with various other dishes, making it a staple in many pantries.
Breading Components: Creating the Perfect Crunch
Achieving the perfect crunch on your chicken tenders involves a well-thought-out breading process. The basic components of the breading include all-purpose flour, seasoned breadcrumbs, and optional eggs. The flour acts as a base, providing a light coating that helps the breadcrumbs adhere to the chicken. Seasoned breadcrumbs, particularly panko breadcrumbs, are recommended for their superior crunchiness. Panko, which is lighter and flakier than traditional breadcrumbs, offers an extra layer of texture that enhances the overall eating experience. For those looking to add richness to the breading, beaten eggs can be included in the process, creating a thicker, more substantial crust.
Spices and Seasonings: Elevating the Taste
In addition to the main ingredients, a blend of spices and seasonings can greatly enhance the flavor profile of the chicken tenders. Common spices used in this recipe include garlic powder, onion powder, paprika, salt, and black pepper. Garlic powder and onion powder add depth and savory notes, while paprika contributes a mild smokiness and vibrant color to the dish. Salt is essential for balancing flavors, and black pepper adds a subtle kick. Together, these spices create a harmonious blend that complements the ranch seasoning and ensures each bite is bursting with flavor.
Step-by-Step Preparation Process
Now that we’ve explored the ingredients, it’s time to dive into the preparation process. Making crispy ranch chicken tenders is straightforward, and breaking it down into clear steps will ensure your cooking experience is smooth and enjoyable.
1. Marinate the Chicken: Start by placing your chicken tenders in a bowl or a resealable plastic bag. Pour in enough buttermilk to fully submerge the chicken. Allow the chicken to marinate for at least 30 minutes to an hour in the refrigerator. This step is crucial for achieving tender, juicy chicken.
2. Prepare the Breading Station: While the chicken is marinating, set up your breading station. In one shallow dish, combine all-purpose flour with a pinch of salt, garlic powder, onion powder, and paprika. In a second shallow dish, beat a couple of eggs until smooth. In a third shallow dish, pour in the seasoned breadcrumbs (preferably panko). This setup will streamline the breading process.
3. Coat the Chicken: Once the marinating time has elapsed, remove the chicken from the buttermilk and allow any excess to drip off. First, dip each tender into the flour mixture, ensuring a thorough coating. Next, transfer the chicken to the egg mixture, allowing any excess to drip off before finally coating it with the panko breadcrumbs. Press the breadcrumbs onto the chicken to ensure they adhere well.
4. Heat the Oil: In a large skillet or deep frying pan, heat a generous amount of oil over medium-high heat. The oil should be hot enough for frying, typically around 350°F (175°C). You can test the temperature by dropping in a small piece of bread; if it sizzles and bubbles, the oil is ready.
5. Fry the Chicken Tenders: Carefully place the breaded chicken tenders into the hot oil, making sure not to overcrowd the pan. Fry them in batches if necessary. Cook for about 4-5 minutes on each side, or until they are golden brown and cooked through. Use a meat thermometer to ensure the internal temperature reaches 165°F (75°C) for safe consumption.
In this first part of the article, we’ve introduced the concept of crispy ranch chicken tenders and provided an overview of the key ingredients that contribute to their deliciousness. From the tender chicken to the flavorful buttermilk marinade and the crispy breading, each step plays a vital role in creating a dish that is both satisfying and enjoyable. Stay tuned for the next section, where we will delve deeper into serving suggestions and tips for storing leftovers, ensuring you can enjoy these chicken tenders for days to come.
Marinating the Chicken: Infusing Flavor
Marinating the chicken tenders is a crucial step that cannot be overlooked if you want to infuse delicious flavors into your dish. Start by placing the chicken tenders in a large bowl or a resealable plastic bag. To create the marinade, combine ranch dressing mix with buttermilk or plain yogurt—this adds a creamy texture and rich flavor that penetrates the chicken.
Let the chicken marinate for at least 30 minutes, but for optimal flavor, aim for 2 to 4 hours or even overnight if time allows. This extended marination time allows the spices to meld into the chicken, ensuring that every bite is bursting with flavor. When ready to cook, remove the chicken from the marinade, letting any excess drip off. This step helps achieve that coveted crispy coating when frying.
Setting Up the Breading Station: A Crucial Step
A well-organized breading station is essential for achieving crispy ranch chicken tenders with a perfect coating. You will need three shallow bowls for the breading process.
1. First Bowl: Place the flour in the first bowl. Season it with salt, pepper, and any additional spices you prefer, such as paprika or garlic powder. This seasoned flour acts as a dry base that helps the coating adhere to the chicken.
2. Second Bowl: In the second bowl, whisk together eggs and a splash of water or milk. The egg wash provides moisture and helps the breadcrumbs stick to the chicken.
3. Third Bowl: Finally, add breadcrumbs (preferably panko for extra crunch) mixed with ranch seasoning to the third bowl. The combination of breadcrumbs and ranch seasoning will give the tenders a flavorful crust.
With your breading station set up, take a moment to ensure that the chicken, flour, egg wash, and breadcrumb mixture are all within easy reach. This organized setup will streamline the coating process and make it more efficient.
Coating the Chicken: Achieving Maximum Crunch
Now comes the fun part—coating the chicken tenders! Begin by taking a marinated chicken tender and dredging it in the seasoned flour, ensuring it is fully coated. Shake off any excess flour before dipping it into the egg wash. This step is crucial, as it creates a bond between the flour and the breadcrumbs.
Next, transfer the chicken tender to the bowl with the breadcrumb mixture. Press the breadcrumbs onto the chicken, ensuring an even coating. The more breadcrumbs that adhere, the crunchier the final product will be. Place the coated tenders on a wire rack or plate, allowing them to rest for a few minutes before frying. This resting time helps the coating cling to the chicken better during frying.
Heating the Oil: Ensuring Perfect Frying
The temperature of the oil plays a significant role in the success of your frying process. For the crispiest chicken tenders, heat vegetable oil or canola oil in a large skillet or deep fryer to about 350°F (175°C). Use a kitchen thermometer to monitor the temperature accurately. If the oil is too hot, the tenders will burn on the outside while remaining undercooked on the inside. Conversely, if the oil is not hot enough, the tenders will absorb too much oil and become greasy instead of crispy.
To test if the oil is ready, you can drop a small piece of bread into the oil; if it bubbles and browns within about 60 seconds, the oil is at the right temperature for frying.
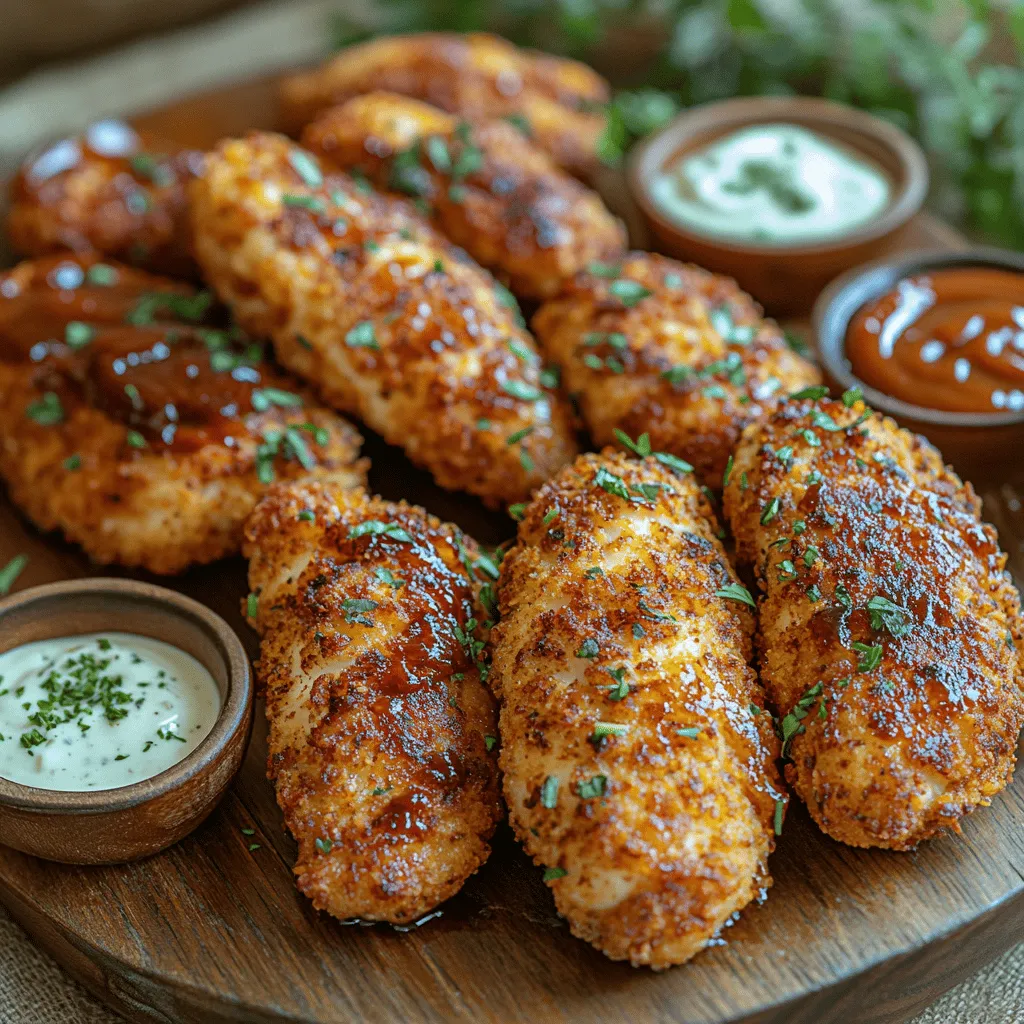
Frying the Chicken: Timing and Technique
When it’s time to fry the chicken tenders, be sure not to overcrowd the pan. Adding too many chicken pieces at once can lower the oil temperature, leading to soggy tenders. Instead, fry the chicken in batches, allowing enough space between each tender to promote even cooking.
Fry each batch for about 4-5 minutes on one side, or until golden brown, before flipping them over to cook the other side for an additional 3-4 minutes. Use a slotted spoon or tongs to carefully turn the tenders, ensuring they cook evenly on both sides. Once the chicken tenders reach a golden-brown color and have an internal temperature of 165°F (74°C), remove them from the oil and place them on a paper towel-lined plate to drain excess oil.
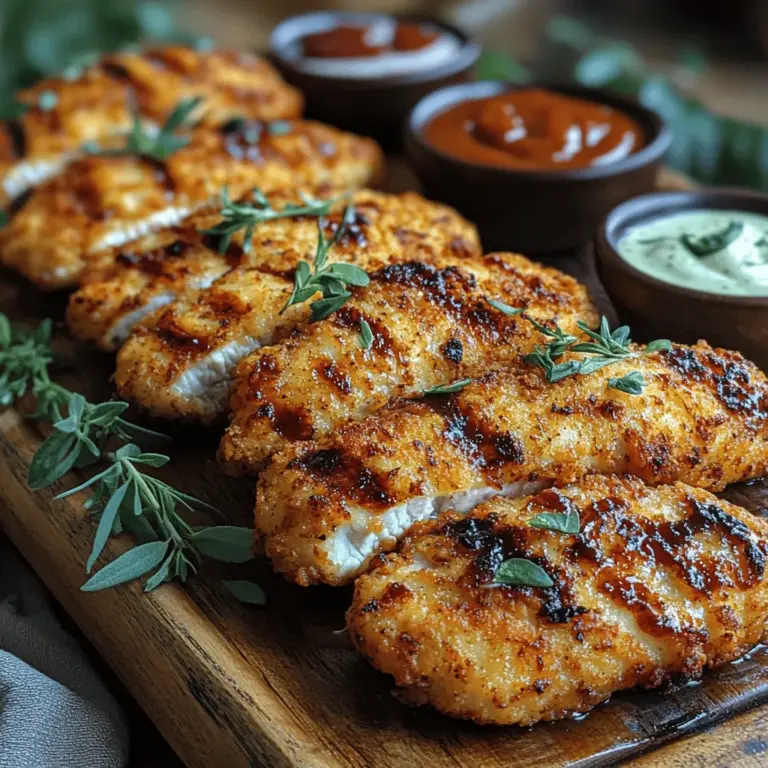
Serving Suggestions: Complementing Your Tenders
Crispy ranch chicken tenders are versatile and pair well with a variety of dipping sauces and side dishes. Here are some delightful suggestions to elevate your meal experience:
– Dipping Sauces: Serve your chicken tenders with an array of dipping sauces, such as classic ranch dressing, honey mustard, barbecue sauce, or a spicy sriracha mayo. Each sauce adds a unique flavor profile that complements the tenders perfectly.
– Side Dishes: Consider pairing your chicken tenders with coleslaw, seasoned fries, or a fresh garden salad for a balanced meal. Mashed potatoes or macaroni and cheese also make excellent comfort food companions.
– Garnishes: Add fresh herbs like parsley or chives to your serving platter for a pop of color and extra flavor. A squeeze of lemon over the tenders just before serving can enhance the dish’s brightness.
Storing and Reheating Leftovers
If you happen to have any leftover crispy ranch chicken tenders, proper storage is key to maintaining their flavor and crunch. Place the cooled tenders in an airtight container and refrigerate them for up to 3 days.
For reheating, avoid the microwave, as it can make the tenders soggy. Instead, preheat your oven to 375°F (190°C) and spread the chicken tenders in a single layer on a baking sheet. Bake for about 10-15 minutes, or until heated through and crispy again. Alternatively, you can re-fry them in a small amount of oil over medium heat, ensuring they regain their crunch.
Nutritional Overview
Crispy ranch chicken tenders are a delicious source of protein, making them a satisfying meal option. Each tender provides a good amount of protein, which is essential for muscle repair and growth. While the dish can be indulgent, there are ways to make it healthier.
Consider using whole wheat breadcrumbs for added fiber, or try baking the tenders instead of frying. To bake, preheat your oven to 400°F (200°C) and line a baking sheet with parchment paper. Place the coated tenders on the sheet and spray them lightly with cooking oil. Bake for approximately 15-20 minutes, flipping halfway through, until the tenders are golden and cooked through.
Conclusion
Crispy ranch chicken tenders are not only a crowd-pleaser but also an easy dish to prepare for any occasion. The combination of flavorful marination, a crunchy coating, and perfect frying techniques results in irresistibly delicious tenders that satisfy any craving. Whether served as an appetizer, a main course, or part of a fun family meal, this recipe is sure to become a favorite.
Encourage yourself to enjoy the cooking process and experiment with variations of this classic recipe. With the right ingredients and techniques, you can create a dish that is not only tasty but also memorable for you and your loved ones.
