
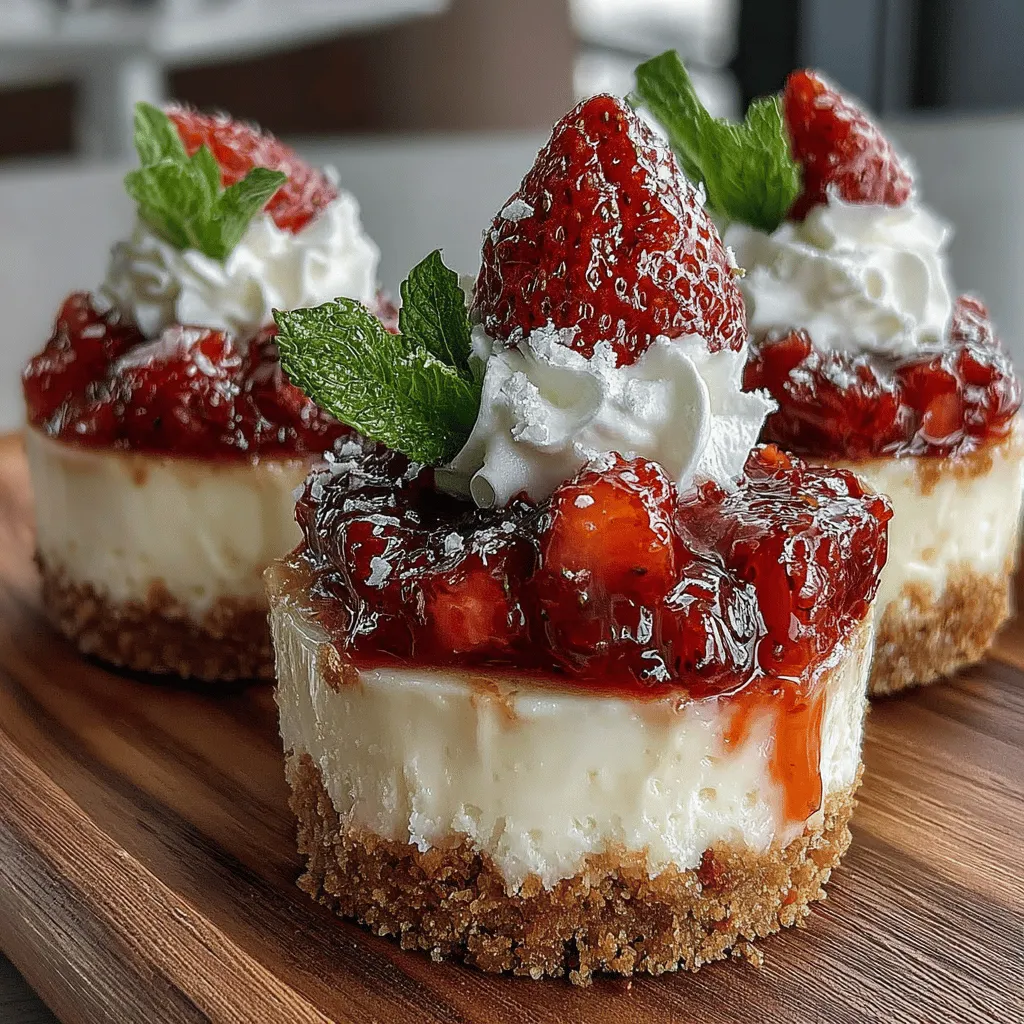
When it comes to desserts that combine simplicity with elegance, few can rival the allure of no-bake cheesecake cups. Among these delightful treats, Strawberry Bliss No-Bake Cheesecake Cups stand out as a fan favorite. With their creamy texture, vibrant strawberry topping, and refreshing hint of lemon, these cheesecake cups are not just a feast for the palate; they are also a visual delight. Perfect for any occasion, from casual family gatherings to sophisticated dinner parties, this dessert offers a burst of flavor that captures the essence of summer in every bite.
The Appeal of No-Bake Cheesecakes
No-bake recipes have gained immense popularity in recent years, and for good reason. They eliminate the need for lengthy baking times and complex oven management, making them an ideal choice for novice bakers and busy individuals alike. With just a few simple steps, you can whip up a dessert that looks and tastes as if it took hours of preparation. No-bake cheesecakes, particularly, are celebrated for their rich and creamy texture without the added hassle of baking.
The Strawberry Bliss No-Bake Cheesecake Cups encapsulate this convenience perfectly. They are not only easy to prepare but also allow for flexibility in presentation. You can serve them in individual cups, making portion control effortless while also providing an attractive serving option. These cheesecake cups are perfect for summer picnics, birthday celebrations, or simply as a sweet treat to enjoy at home.
Flavor Profile
At the heart of the Strawberry Bliss No-Bake Cheesecake Cups lies a harmonious blend of flavors that tantalizes the taste buds. The creamy base, made primarily of cream cheese, is enriched with powdered sugar and a hint of vanilla extract, creating a sweet yet sophisticated filling. The addition of sour cream introduces a delightful tanginess, while heavy whipping cream gives the cheesecake its light and airy consistency.
The star of the show, however, is the strawberry topping. Fresh strawberries contribute a burst of sweetness and juiciness that perfectly complements the rich cheesecake layer beneath. A drizzle of lemon juice provides a refreshing acidity, balancing the sweetness of the strawberries and enhancing their natural flavor. This combination of creamy and fruity elements results in a dessert that is not only indulgent but also refreshing, making it an ideal treat for warm weather.
Understanding No-Bake Cheesecakes
What Are No-Bake Cheesecakes?
No-bake cheesecakes are desserts that do not require baking. Instead, they rely on refrigeration to set the filling, resulting in a creamy, smooth texture. This method typically involves combining cream cheese with sweeteners, flavorings, and stabilizers such as whipped cream or gelatin. The absence of baking means that these cheesecakes can be prepared quickly and enjoyed without the wait, making them perfect for last-minute gatherings or spontaneous celebrations.
Benefits of No-Bake Cheesecakes
The benefits of no-bake cheesecakes extend beyond their convenience. They are often lighter than their baked counterparts, as they do not rely on eggs and flour for structure. Additionally, no-bake cheesecakes can be made ahead of time, allowing flavors to meld and intensify in the refrigerator. This makes them a practical choice for busy hosts who want to impress guests without spending hours in the kitchen.
When to Serve No-Bake Cheesecakes
No-bake cheesecakes shine in various settings. Their light and refreshing taste makes them an excellent choice for summer barbecues, picnics, and potlucks. They are also a fantastic option for holiday celebrations, as they can be made in advance and served chilled, allowing hosts to enjoy the festivities without being tied to the kitchen. Whether it’s a birthday party, an anniversary celebration, or simply a sweet treat after dinner, no-bake cheesecakes fit seamlessly into any occasion.
Ingredients Breakdown
To create the Strawberry Bliss No-Bake Cheesecake Cups, you’ll need a few key ingredients that work together to create the delicious layers of flavor and texture. Here’s an overview of the ingredients and their roles in this delightful dessert.
Cheesecake Filling
– Cream Cheese: The cornerstone of any cheesecake, cream cheese provides the rich and creamy base that defines the dessert. It should be at room temperature for easy blending.
– Powdered Sugar: This ingredient adds sweetness to the cheesecake filling while ensuring a smooth texture without any gritty feel.
– Vanilla Extract: A few drops of vanilla extract enhance the overall flavor profile, adding depth and warmth to the cheesecake.
– Heavy Whipping Cream: Whipped to soft peaks, heavy cream adds lightness and an airy texture to the cheesecake, making it melt in your mouth.
– Sour Cream: This ingredient offers a tangy flavor that balances the sweetness of the cream and sugar, enriching the overall taste of the cheesecake.
– Lemon Zest: A touch of lemon zest provides brightness and freshness, elevating the flavor and complementing the strawberries beautifully.
Strawberry Topping
– Fresh Strawberries: The star ingredient of this dessert, fresh strawberries not only serve as a topping but also add vibrant color and natural sweetness.
– Granulated Sugar: Used to macerate the strawberries, granulated sugar enhances their flavor, drawing out the juices for a delicious topping.
– Lemon Juice: A splash of lemon juice balances the sweetness of the strawberries, adding a refreshing acidity that brings out their natural flavor.
Crust
– Crushed Graham Crackers or Digestive Biscuits: These form the crunchy base of the cheesecake cups, providing a pleasant contrast to the creamy filling.
– Unsalted Butter: Melted butter binds the crust together, ensuring it holds its shape while adding a rich flavor.
– Granulated Sugar: A little sugar in the crust enhances its sweetness, making every layer of the dessert harmonious.
Step-by-Step Instructions for Preparation
Now that we’ve covered the ingredients and their importance, let’s dive into the preparation process for these delightful Strawberry Bliss No-Bake Cheesecake Cups. The steps are straightforward, making it easy for anyone to create this delicious dessert.
Step 1: Prepare the Crust
Start by crushing the graham crackers or digestive biscuits into fine crumbs. You can use a food processor for a quick and easy method, or place the crackers in a zip-top bag and crush them with a rolling pin. Once you have your crumbs, transfer them to a mixing bowl.
Next, melt the unsalted butter in a small saucepan or microwave. Pour the melted butter over the crushed crumbs, along with the granulated sugar. Mix the ingredients together until the crumbs are evenly coated and resemble wet sand.
Now, take your serving cups and spoon the crumb mixture into the bottom of each cup, pressing down gently to create an even layer. This crust will provide a delightful crunch that contrasts beautifully with the creamy filling.
Step 2: Make the Cheesecake Filling
In a large mixing bowl, beat the room-temperature cream cheese with an electric mixer until it’s smooth and creamy. Gradually add the powdered sugar, mixing until fully incorporated. Add in the vanilla extract, sour cream, and lemon zest, and beat until the mixture is well combined and smooth.
In another bowl, whip the heavy cream until soft peaks form. Gently fold the whipped cream into the cream cheese mixture, ensuring you maintain the light and airy texture. Be careful not to overmix; you want the filling to remain fluffy.
Step 3: Assemble the Cheesecake Cups
Now it’s time to assemble the cheesecake cups. Spoon the cheesecake filling into each cup over the crust layer, filling them to your desired level. Smooth the tops with a spatula or the back of a spoon.
Step 4: Prepare the Strawberry Topping
To make the strawberry topping, wash and hull the fresh strawberries. Slice them into quarters and place them in a bowl. Sprinkle granulated sugar over the strawberries and drizzle with lemon juice. Gently toss to coat the strawberries in the sugar and lemon juice mixture, allowing them to macerate for about 10-15 minutes until they release their juices.
Step 5: Top the Cheesecake Cups
Once the strawberries are ready, spoon the macerated strawberries over the cheesecake filling in each cup. Ensure each cup gets a generous portion of the juicy topping, allowing some of the strawberry juices to drizzle down the sides.
Step 6: Chill and Serve
Cover the cheesecake cups with plastic wrap and place them in the refrigerator for at least four hours, or overnight for best results. This chilling time allows the flavors to meld and the cheesecake to set properly. When you’re ready to serve, simply remove the cups from the refrigerator and enjoy this delightful dessert with friends and family.
In the next part of this article, we will delve deeper into tips for perfecting your no-bake cheesecake cups, variations to try, and storage suggestions to keep your dessert fresh and delicious. Stay tuned to learn more about creating the ultimate Strawberry Bliss No-Bake Cheesecake Cups!
Preparing the Crust
The crust is a critical foundation of any cheesecake, providing both texture and structure. For our Strawberry Bliss No-Bake Cheesecake Cups, we’ll create a buttery, crumbly crust that complements the creamy filling perfectly.
Importance of Texture and Firmness in the Crust
An ideal cheesecake crust should be firm yet tender, offering a satisfying crunch as you dig into the creamy layers above. A well-prepared crust prevents the filling from seeping through and keeps the layers distinct, enhancing both the taste and visual appeal of your dessert.
Tips for Pressing the Crust Evenly
To achieve a uniform crust, use a combination of crushed graham crackers and melted butter. The general rule of thumb is to use about 1 ½ cups of crushed graham crackers mixed with ½ cup of melted butter.
1. Combine Ingredients: In a mixing bowl, stir together the graham cracker crumbs and melted butter until the mixture resembles wet sand.
2. Press Evenly: Transfer the mixture into your serving cups and press down firmly with the back of a spoon or a flat-bottomed glass. Make sure the crust is evenly packed, reaching up the sides of the cups to create a solid base.
3. Chill: Place the cups in the refrigerator for about 15-20 minutes to allow the crust to set before adding the filling.
Making the Strawberry Topping
The strawberry topping is not only a visual centerpiece but also a burst of flavor that elevates the cheesecake cups.
Explanation of Macerating Strawberries and Its Benefits
Macerating strawberries involves sprinkling them with sugar and letting them sit, which draws out their natural juices. This process softens the fruit and intensifies its sweetness, making it the perfect topping for our cheesecake cups.
1. Macerate the Strawberries: Slice about 2 cups of fresh strawberries and place them in a bowl. Sprinkle with 1-2 tablespoons of sugar and a squeeze of lemon juice. Toss to combine and let them sit for about 30 minutes. This allows the strawberries to release their juices, creating a syrupy topping that complements the cheesecake beautifully.
How to Achieve the Perfect Balance of Flavors
When preparing the strawberry topping, it’s essential to balance the sweetness with a hint of acidity. The lemon juice not only brightens the flavor but also enhances the natural taste of the strawberries. Adjust the sugar according to your preference and the sweetness of the strawberries used.
Preparing the Cheesecake Filling
The filling is the star of the show in these cheesecake cups. Achieving a smooth and creamy mixture is vital for an enjoyable texture.
Techniques for Achieving a Smooth Cream Cheese Mixture
Start with room-temperature cream cheese to ensure that it blends seamlessly into the mixture.
1. Beat the Cream Cheese: In a mixing bowl, beat 8 ounces of softened cream cheese with an electric mixer until creamy and smooth.
2. Add Sugar and Vanilla: Gradually add ½ cup of powdered sugar and 1 teaspoon of vanilla extract, mixing until fully incorporated.
Importance of Whipping Cream to the Right Consistency
The whipped cream adds lightness and a luscious texture to the filling. Make sure to whip the cream to stiff peaks for the best results.
1. Whip the Cream: In a separate bowl, whip 1 cup of heavy cream with an electric mixer until stiff peaks form. This means the cream should hold its shape when you lift the beaters.
Folding Technique for Maintaining Airiness
Folding is a gentle mixing technique that helps retain the airiness of the whipped cream.
1. Combine Mixtures: Gently fold the whipped cream into the cream cheese mixture using a spatula. Start by adding a small amount of whipped cream to lighten the cream cheese. Then, gradually fold in the remaining whipped cream, taking care not to deflate the mixture.
Assembling the Cheesecake Cups
Now that we have all our components ready, it’s time to assemble the cheesecake cups.
Layering Techniques for Visual Appeal and Flavor Combination
For a beautiful presentation, layer the cheesecake filling and strawberry topping thoughtfully.
1. Layer the Filling: Spoon a generous layer of the cheesecake filling over the prepared crust, filling each cup about halfway.
2. Add Strawberries: Top the cheesecake layer with a spoonful of the macerated strawberries, ensuring some of the syrup drizzles down the sides for added color and flavor.
3. Repeat Layers: If desired, repeat the layers for a more indulgent cup.
Tips for Portioning Out the Filling and Topping Evenly
Using a piping bag or a ziplock bag with the corner cut off can help you distribute the filling and topping evenly. This method allows for greater control and can create a more visually appealing result.
Chilling and Serving
Chilling is a crucial step in the cheesecake preparation process, allowing the flavors to meld together and the texture to set correctly.
Importance of Chilling for Flavor Melding and Texture Setting
After assembling your cheesecake cups, cover them with plastic wrap and chill in the refrigerator for at least 4 hours, or overnight if possible. This chilling time enhances the flavors and allows the filling to firm up, making it easier to serve.
Suggestions for Presentation and Garnishing
When ready to serve, consider garnishing the cheesecake cups with fresh mint leaves, a drizzle of chocolate sauce, or a sprinkle of graham cracker crumbs for added texture. Present them on a decorative platter for a stunning display at any gathering.
Flavor Variations and Customization Ideas
One of the best things about cheesecake cups is their versatility. Here are some ways to customize your Strawberry Bliss No-Bake Cheesecake Cups to suit your taste preferences.
Suggestions for Alternative Toppings
– Mixed Berries: Instead of just strawberries, try a blend of blueberries, raspberries, and blackberries for a mixed berry topping.
– Chocolate Ganache: For a richer dessert, drizzle melted chocolate or chocolate ganache over the top.
– Caramel Sauce: A drizzle of caramel can add a delightful sweetness that pairs beautifully with the creaminess of the cheesecake.
Ideas for Flavoring the Cheesecake Filling
– Chocolate Cheesecake: Add a half cup of cocoa powder or melted chocolate to the cream cheese mixture for a chocolate-flavored version.
– Coffee Cheesecake: Mix in instant coffee granules or espresso powder for a coffee-flavored delight.
Potential Dietary Substitutions
For those with dietary restrictions, consider the following substitutions:
– Dairy-Free Options: Use vegan cream cheese and coconut cream in place of regular cream cheese and heavy cream.
– Gluten-Free Options: Substitute graham cracker crumbs with gluten-free cookie crumbs.
Nutritional Overview
While indulging in desserts, it’s essential to consider nutrition. Here’s a quick overview of the nutritional content of each serving of Strawberry Bliss No-Bake Cheesecake Cups.
Basic Nutritional Information Per Serving
– Calories: Approximately 250-300 calories
– Fat: 20 grams
– Carbohydrates: 25 grams
– Sugar: 15 grams
– Protein: 3 grams
Discussion on the Dessert’s Indulgence Versus Occasional Treat Balance
This dessert is an indulgent treat that can be enjoyed on special occasions. It is essential to balance enjoyment with moderation, particularly with sweet treats like cheesecake.
Benefits of Using Fresh Ingredients Versus Processed Ones
Using fresh strawberries and real cream cheese not only elevates the flavor but also provides more nutrients compared to processed ingredients. Fresh fruits are rich in vitamins and antioxidants, while using natural dairy products can enhance the overall quality of your dessert.
Conclusion
In summary, the Strawberry Bliss No-Bake Cheesecake Cups are a delightful fusion of creamy, sweet, and fruity flavors, making them an irresistible dessert for any occasion. The ease of preparation combined with the stunning presentation makes these cups perfect for gatherings or personal enjoyment.
We encourage you to try this recipe and share it with friends and family. The joy of crafting and sharing delicious desserts is unparalleled, and with this no-bake cheesecake, you’ll be sure to impress. So gather your ingredients, follow the steps, and indulge in a blissful treat that’s as enjoyable to make as it is to eat!
