Choco-Nutty Banana Bliss Bars Recipe
Introduction
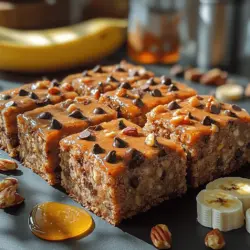
In the quest for healthy yet satisfying snacks or desserts, the Choco-Nutty Banana Bliss Bars emerge as a delightful solution. Combining the rich flavors of ripe bananas, velvety chocolate, and crunchy nuts, these bars are not only delicious but also packed with nutritional benefits. They serve as an ideal treat for those seeking a quick energy boost or a wholesome addition to their diet.
The delectable fusion of sweet banana, creamy peanut butter, and the indulgence of chocolate creates a flavor profile that caters to both health-conscious individuals and dessert lovers alike. Each bite delivers a balance of sweetness and richness, making them a perfect fit for breakfast, an afternoon pick-me-up, or a post-dinner treat.
Moreover, the ingredients featured in these bars come with a host of health benefits. Bananas, for instance, are known for their natural sweetness and high potassium content, which aids in muscle function and heart health. Chocolate, especially dark varieties, is rich in antioxidants, while nuts provide healthy fats and protein, contributing to sustained energy levels. Together, these components make Choco-Nutty Banana Bliss Bars a guilt-free indulgence that nourishes the body and satisfies the palate.
The Allure of Choco-Nutty Banana Bliss Bars
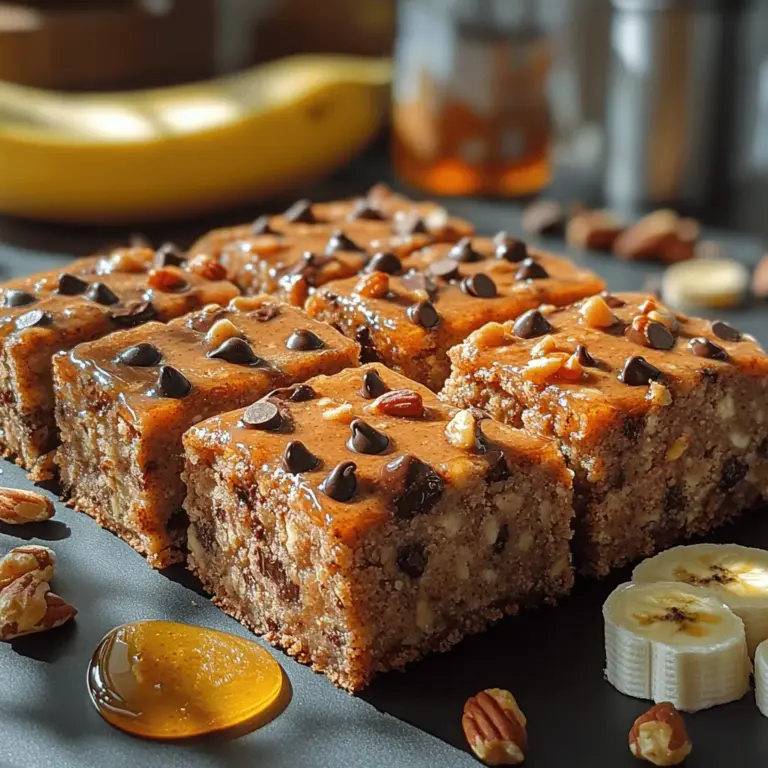
What sets the Choco-Nutty Banana Bliss Bars apart is their unique texture and flavor. The chewy consistency, complemented by the crunch of nuts, creates a satisfying mouthfeel that keeps you coming back for more. The sweetness from the bananas and the slight bitterness of chocolate chips harmonize beautifully, offering a balanced treat that is both fulfilling and enjoyable.
These bars are incredibly versatile, making them suitable for various occasions. Whether you need a quick breakfast option before heading out the door, a convenient snack to fuel your workout, or a sweet dessert to cap off your day, these bars check all the boxes. They also hold up well in lunch boxes or as an on-the-go treat, making them a practical choice for busy lifestyles.
Incorporating homemade snacks into your diet is essential for maintaining a balanced lifestyle. By preparing these bars in your kitchen, you have complete control over the ingredients, ensuring that you avoid additives and preservatives often found in store-bought options. Plus, the satisfaction of creating something delicious from scratch adds to the overall experience of enjoying these wholesome treats.
Ingredients Breakdown
To create these Choco-Nutty Banana Bliss Bars, you’ll need a selection of simple yet nutritious ingredients. Each component plays a crucial role in enhancing the flavor and texture of the bars, making them not only tasty but also beneficial to your health:
– Ripe Bananas: The star of the recipe, ripe bananas bring natural sweetness and moisture to the bars. As bananas ripen, their starches convert to sugars, making them an excellent natural sweetener that eliminates the need for excessive added sugars.
– Rolled Oats: Oats are a fantastic source of dietary fiber, which supports digestive health and keeps you feeling full longer. They also add a hearty texture to the bars, contributing to their satisfying chewiness.
– Creamy Peanut Butter: This ingredient is not only delicious but also rich in healthy fats and protein. Peanut butter adds creaminess and helps bind the bars together, ensuring they hold their shape while providing essential nutrients that keep your energy levels steady.
– Honey or Maple Syrup: Both honey and maple syrup serve as natural sweetener alternatives, enhancing the bars’ flavor without the need for refined sugars. They provide a touch of sweetness that balances the nuttiness of the peanut butter and the richness of the chocolate.
– Chocolate Chips: For many, chocolate is the ultimate indulgence. Adding chocolate chips not only elevates the flavor profile but also introduces a delightful contrast to the other ingredients. Opt for dark chocolate chips for a more health-conscious choice, as they contain less sugar and offer additional antioxidants.
– Chopped Nuts: Incorporating nuts such as walnuts, almonds, or pecans adds a satisfying crunch and boosts the nutritional value. Nuts are rich in healthy fats, protein, and various vitamins and minerals that support overall health.
– Vanilla Extract and Cinnamon: These two ingredients enhance the bars’ flavor, adding depth and warmth. Vanilla extract provides a sweet aroma, while cinnamon offers a subtle spiciness that complements the sweetness of the bananas.
Step-by-Step Instructions for Choco-Nutty Banana Bliss Bars
Now that you’re familiar with the enticing qualities and health benefits of Choco-Nutty Banana Bliss Bars, it’s time to dive into the preparation process. The first step in creating these delicious bars is to preheat your oven, which is crucial for achieving the perfect baking environment.
Preheat the Oven: Set your oven to 350°F (175°C) to ensure it reaches the optimal temperature for baking. Preheating is essential as it helps the bars cook evenly, resulting in a delightful texture that is neither too dry nor too soggy. While the oven is warming, you can prepare your ingredients and gather your baking supplies.
By beginning with the right preparation, you set the stage for creating a batch of Choco-Nutty Banana Bliss Bars that are sure to impress. Stay tuned for the next steps in this delicious recipe, where we’ll walk you through the process of combining these wholesome ingredients to create a snack that will become a staple in your kitchen.

Mashing the Bananas: Techniques for Achieving the Right Consistency
The foundation of the Choco-Nutty Banana Bliss Bars is ripe bananas, which provide natural sweetness and moisture. To achieve the ideal consistency for your bars, start with very ripe bananas—look for those that are heavily speckled or even slightly brown.
1. Use a Fork or Potato Masher: Place the bananas in a mixing bowl and mash them with a fork or potato masher. Aim for a smooth texture with only a few small lumps remaining; this ensures that the bananas integrate well into the mixture without leaving large chunks.
2. Blending Method: If you prefer an ultra-smooth consistency, you can also use an immersion blender or a regular blender. Just be cautious not to over-blend, as you still want the mixture to retain some body.
3. Consistency Check: The mashed bananas should be thick but pourable. If they’re too runny, it may affect the final texture of the bars, so make sure to achieve a good balance.
Mixing Wet Ingredients: Tips for Thorough Mixing to Ensure Flavor Integration
Once your bananas are mashed, it’s time to mix the wet ingredients. This includes nut butter, maple syrup (or sweetener of choice), and vanilla extract.
1. Choosing Nut Butter: Almond butter, peanut butter, or sunflower seed butter works well. If using natural nut butters, make sure they are well-stirred to combine the oil evenly.
2. Mixing Technique: In a separate bowl, combine your wet ingredients using a whisk or spatula. Start by mixing the nut butter and maple syrup together until smooth. Gradually add in the mashed bananas, followed by the vanilla extract. This method ensures that the nut butter integrates well with the bananas, preventing clumps.
3. Flavor Enhancer: Don’t hesitate to add a pinch of salt to your wet ingredients. It can elevate the flavors and balance the sweetness of the bars.
Combining Dry Ingredients: Importance of Even Distribution for Flavor
Now that your wet ingredients are combined, it’s time to prepare the dry ingredients. This typically includes rolled oats, flour (or gluten-free substitute), baking powder, and cocoa powder.
1. Sifting: Sift your cocoa powder to eliminate any lumps, ensuring smooth incorporation into the mixture. This step is critical for achieving a uniform chocolate flavor throughout the bars.
2. Mix Thoroughly: In a separate bowl, combine your dry ingredients. Use a whisk to break up any clumps and mix thoroughly. This ensures that the baking powder is evenly distributed, which is essential for even rising.
3. Integrating Ingredients: When adding the dry mixture to the wet mixture, do so in increments. This will make it easier to combine everything without overmixing.
Combining Mixtures: Avoiding Overmixing to Maintain Texture
Combining the wet and dry ingredients is a crucial step in the preparation of your Choco-Nutty Banana Bliss Bars.
1. Gentle Folding: Use a spatula to fold the dry ingredients into the wet ingredients. Be gentle and avoid vigorous mixing, as overmixing can result in denser bars. The goal is to combine until just moistened; small pockets of dry ingredients are acceptable.
2. Add-Ins: At this stage, feel free to fold in any add-ins like chopped nuts, chocolate chips, or seeds. This not only enhances texture but also adds delightful bursts of flavor.
Spreading in the Pan: Techniques for an Even Layer
With your batter ready, it’s time to transfer it to the baking pan.
1. Prepare the Pan: Line an 8×8 inch (or similar size) baking pan with parchment paper, leaving some overhang on the sides for easy removal. This will prevent the bars from sticking and make cleanup a breeze.
2. Spreading Technique: Pour the mixture into the pan and use an offset spatula or the back of a spoon to spread it evenly. Make sure to reach the corners and smooth the top for an even bake.
3. Tapping Method: Once spread, tap the pan gently on the counter to remove air bubbles. This will help the bars bake evenly.
Baking Tips: Signs That the Bars Are Perfectly Baked
Baking is an essential step to achieving the perfect texture for your bars.
1. Baking Time: Preheat your oven to 350°F (175°C) and bake for 20-25 minutes. Keep an eye on them as baking times can vary depending on your oven and the pan used.
2. Testing for Doneness: Look for the edges to begin pulling away from the sides of the pan and a slight golden-brown color on top. You can also insert a toothpick in the center; if it comes out clean or with a few moist crumbs, they are done.
3. Avoid Overbaking: Overbaking can dry out the bars, so err on the side of caution. They may seem slightly soft in the middle when you take them out, but they will firm up as they cool.
Cooling and Cutting: Best Practices for Achieving Clean Cuts
After baking, patience is key for achieving clean cuts.
1. Cooling: Allow the bars to cool in the pan for about 10-15 minutes. This cooling period helps set the bars, making them easier to cut.
2. Removing from Pan: Use the parchment overhang to lift the bars out of the pan. Place them on a wire rack to cool completely.
3. Cutting Technique: Once cool, use a sharp knife to cut the bars into squares or rectangles. For the cleanest cuts, wipe the knife with a damp cloth between cuts to remove any sticky residue.
Nutritional Information
Breakdown of Calories and Nutrients Per Serving
Choco-Nutty Banana Bliss Bars are not only delicious but also nutritious. Each serving (one bar) contains approximately:
– Calories: 180
– Protein: 4g
– Fat: 7g
– Carbohydrates: 24g
– Fiber: 3g
– Sugar: 8g
Discussion of the Health Benefits of Each Ingredient
1. Bananas: Rich in potassium and vitamin C, bananas promote heart health and boost immunity.
2. Oats: A great source of soluble fiber, oats help regulate cholesterol levels and keep you feeling full longer.
3. Nut Butter: Provides healthy fats and protein, which are essential for energy and muscle repair.
4. Cocoa Powder: Packed with antioxidants, cocoa can improve heart health and boost mood.
Comparison to Store-Bought Bars in Terms of Nutrition and Additives
Homemade Choco-Nutty Banana Bliss Bars are far superior to many store-bought bars, which often contain added sugars, preservatives, and artificial ingredients. By making your bars at home, you control the quality of ingredients, ensuring that you consume wholesome, nutrient-dense snacks.
Variations and Customizations
Suggestions for Ingredient Substitutions
– Nut Butters: Swap almond butter for peanut butter or tahini for nut-free variations.
– Sweeteners: Agave syrup or honey can be used in place of maple syrup for a different flavor profile.
Options for Adding Extras
For added texture and flavor, consider mixing in:
– Dried Fruits: Raisins, cranberries, or chopped dates for natural sweetness.
– Seeds: Chia or flaxseeds can boost the nutritional content.
Adjusting the Recipe for Dietary Needs
– Gluten-Free: Use gluten-free oats and a gluten-free flour alternative, like almond or coconut flour.
– Vegan: Ensure that any sweeteners or nut butters are certified vegan.
Serving Suggestions
Ideas for Enjoying the Bars
Choco-Nutty Banana Bliss Bars can be enjoyed in various ways:
1. Pairing Options: Serve them with a dollop of yogurt, fresh fruit, or a glass of nut milk for a balanced snack or breakfast.
2. Meal Prep: These bars are perfect for meal prepping. Slice and store them in an airtight container in the refrigerator for quick grab-and-go snacks during the week.
Ideas for Serving at Gatherings
These bars make a fantastic treat for gatherings or parties. Cut them into smaller squares and serve alongside a fruit platter or a selection of healthy dips. They are also a hit at potlucks or as a dessert option for health-conscious friends.
Conclusion
Choco-Nutty Banana Bliss Bars are a delightful, wholesome treat that is easy to make at home. The combination of ripe bananas, oats, and nut butter creates a satisfying snack that is both nutritious and delicious. By making these bars yourself, you not only control the ingredients but also enjoy the satisfaction of creating something healthy and tasty.
We encourage you to try this recipe and experience the bliss of these bars firsthand. Whether you’re looking for a quick breakfast, a mid-afternoon snack, or a sweet treat to share with friends, these bars will not disappoint. Enjoy your culinary adventure and revel in the joy of homemade goodness!