Introduction
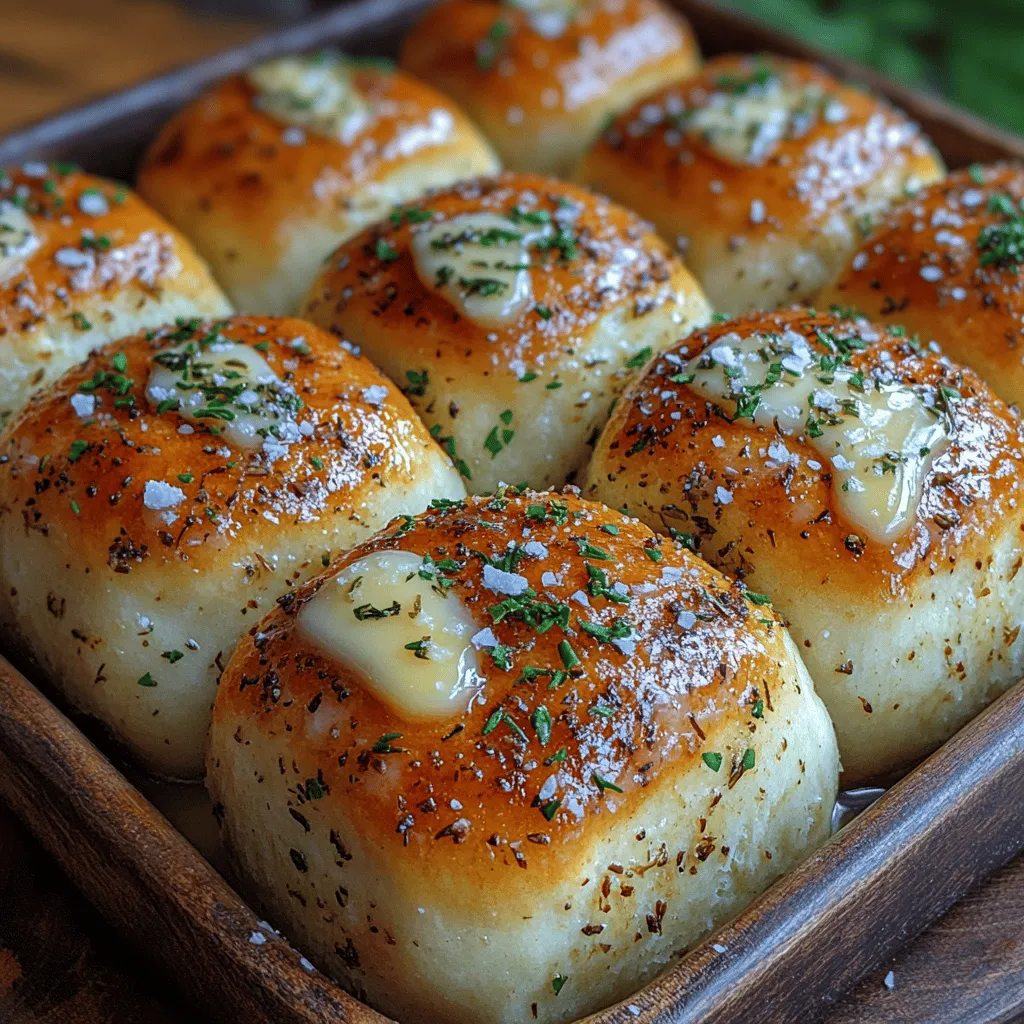
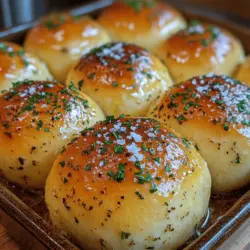
Imagine the warm, comforting aroma of freshly baked bread wafting through your home, beckoning family and friends to gather around the dining table. This is the magic of homemade bread, a culinary experience that not only fills your kitchen with delightful scents but also nourishes the soul. Among the many varieties of homemade bread, Heavenly Buttery Garlic Herb Rolls stand out for their rich flavor, soft texture, and versatility. Whether served as a side for a hearty meal, a base for sliders, or simply enjoyed with a pat of butter, these rolls are a delightful addition to any table.
The appeal of these rolls lies not only in their buttery richness and aromatic garlic-herb blend but also in the satisfaction that comes from creating something so delicious from scratch. Each bite offers a perfect balance of flavors, with the garlic providing a gentle kick, while the fresh herbs add a touch of freshness. This recipe captures the essence of comfort food, making it an inviting choice for family gatherings, holiday feasts, or a cozy dinner at home.
The Allure of Homemade Bread
Baking bread at home is a sensory experience that engages all your senses. From the initial mixing of ingredients to the sight of dough rising and the sound of a crusty exterior cracking as it cools, the process is both rewarding and therapeutic. Kneading the dough provides a tactile experience, allowing you to connect with the ingredients and the art of baking. The anticipation builds as you wait for the dough to rise, transforming simple ingredients into something extraordinary.
Homemade bread offers a multitude of health benefits compared to store-bought options. When you make bread at home, you have complete control over the ingredients, allowing you to avoid preservatives and additives often found in commercial bread. You can choose high-quality flour, reduce sugar, and experiment with whole grains, making it a healthier alternative. Moreover, fresh bread is often more nutritious, retaining more vitamins and minerals than packaged bread that has been sitting on the shelf.
The emotional connection associated with baking bread cannot be overstated. Many of us have fond memories of watching loved ones knead dough or the simple joy of breaking bread with family around the table. The act of baking evokes nostalgia and creates a warm atmosphere, making it a cherished tradition in many households. With each roll you create, you are not just preparing a meal; you are crafting memories that will last a lifetime.
Essential Ingredients for Heavenly Buttery Garlic Herb Rolls
Creating the perfect Heavenly Buttery Garlic Herb Rolls begins with selecting the right ingredients. Each component plays a crucial role in achieving the desired texture and flavor. Here’s a detailed overview of the essential ingredients you’ll need:
All-Purpose Flour
All-purpose flour serves as the backbone of this roll recipe. Its moderate protein content strikes a balance between softness and structure, allowing the rolls to rise beautifully while maintaining a tender crumb. For best results, ensure your flour is fresh and stored properly. If you’re feeling adventurous, you can also experiment with bread flour, which has a higher protein content for a chewier texture.
Sugar
Sugar is not just for sweetness; it also plays a vital role in yeast activation. It acts as food for the yeast, helping it to multiply and produce carbon dioxide, which is essential for the dough to rise. Additionally, sugar enhances the flavor of the rolls, contributing to a golden-brown crust when baked.
Active Dry Yeast
Active dry yeast is the leavening agent that will give your rolls their airy texture. It works by fermenting the sugars in the dough, producing carbon dioxide gas that causes the dough to rise. To ensure your yeast is active, it’s important to dissolve it in warm water (around 110°F or 43°C) and let it sit for a few minutes until it becomes frothy. This step is crucial for a successful rise.
Warm Milk
Warm milk adds richness and moisture to the dough while also promoting yeast activation. The ideal temperature for warming the milk should be around 100°F (38°C) to create the perfect environment for the yeast to thrive. Too hot, and you risk killing the yeast; too cold, and it won’t activate properly.
Unsalted Butter
Using unsalted butter allows you to control the saltiness of your rolls. Butter contributes to the rolls’ tender crumb and rich flavor, making them irresistibly buttery. When melted and incorporated into the dough, it creates a soft texture that contrasts beautifully with the crust.
Eggs
Eggs enrich the dough, providing both moisture and structure. They help bind the ingredients together, resulting in a cohesive dough that rises well. Additionally, the proteins in eggs contribute to the rolls’ overall structure and tenderness.
Garlic and Fresh Herbs
Fresh garlic and herbs elevate the flavor of these rolls, providing an aromatic experience that complements the buttery richness. Garlic adds a savory depth, while herbs like rosemary, thyme, or parsley infuse the dough with freshness. The combination creates a delightful flavor profile that pairs wonderfully with a variety of dishes.
Optional Flaky Sea Salt
For an added touch of sophistication, consider sprinkling flaky sea salt on top of the rolls before baking. This finishing touch enhances the flavor and presentation, providing a delightful contrast to the sweetness of the dough.
Step-by-Step Instructions for Perfect Rolls
Now that you have all your ingredients ready, it’s time to dive into the process of making your Heavenly Buttery Garlic Herb Rolls. Follow these step-by-step instructions for the perfect rolls:
Activating the Yeast
Begin by activating the yeast. In a small bowl, combine the warm milk and sugar, then sprinkle the active dry yeast over the top. Allow this mixture to sit undisturbed for about 5-10 minutes. You should see a frothy layer forming on the surface, indicating that the yeast is alive and ready to work its magic. If the mixture remains flat and does not foam, your yeast may be inactive, and you will need to start over with fresh yeast.
Preparing the Dough
In a large mixing bowl, combine the all-purpose flour and a pinch of salt. Create a well in the center and pour in the activated yeast mixture, melted unsalted butter, and beaten eggs. Use a wooden spoon or spatula to gently mix the ingredients together until a shaggy dough forms. At this stage, you want to incorporate all the flour but not overwork the dough.
Kneading the Dough
Once the dough comes together, transfer it to a lightly floured surface. Knead the dough for about 8-10 minutes, using the palms of your hands to push it away from you, folding it back over itself, and rotating it as you go. You know the dough is ready when it becomes smooth and elastic, and springs back when gently pressed. If the dough feels sticky, you can add a little more flour, but be cautious not to add too much, as this will alter the texture of your rolls.
First Rise
After kneading, place the dough in a lightly greased bowl, turning it once to coat the surface. Cover the bowl with a clean kitchen towel or plastic wrap and let it rise in a warm, draft-free area for about 1-2 hours, or until it has doubled in size. The ideal temperature for rising is around 75°F to 80°F (24°C to 27°C). If your kitchen is cool, you can turn on the oven for a minute or two, then turn it off and place the dough inside to rise.
Preparing the Garlic Herb Mixture
While the dough is rising, prepare the garlic herb mixture that will be incorporated into the rolls. Finely chop your choice of fresh herbs, such as rosemary, thyme, or parsley, and mince the garlic. In a small bowl, combine the herbs and garlic with a tablespoon of melted butter and a pinch of salt. This mixture will be added to the rolls later, infusing them with a burst of flavor.
By following these initial steps, you are on your way to creating Heavenly Buttery Garlic Herb Rolls that will impress your family and friends. The combination of fresh ingredients and the love put into the process will shine through in each delicious bite. Stay tuned for the next part, where we will delve into shaping the rolls, the second rise, and the final baking instructions, ensuring your rolls turn out perfect every time.