Introduction
There’s something undeniably enchanting about the aroma of freshly baked cookies wafting through the home. Homemade cookies, with their warm, gooey centers and crisp edges, evoke feelings of nostalgia and comfort, taking us back to our childhood kitchens where the sweet scent signaled a treat was on the way. In a world where everything seems to move at lightning speed, comfort food like cookies provides a much-needed pause, a moment to savor something sweet and delightful.
Among the myriad of cookie recipes that grace kitchens around the globe, none quite captures the heart like the classic chocolate chip cookie. Enter the “Heavenly Cookie Bliss” recipe, which promises to elevate this beloved treat to new heights. This cookie recipe is a perfect blend of flavors and textures, ensuring that each bite is a euphoric experience. Whether you’re baking for a special occasion or simply indulging in a personal treat, these cookies will undoubtedly become a cherished staple in your recipe repertoire.
The Magic of Chocolate Chip Cookies
The chocolate chip cookie has a storied history that dates back to the 1930s when Ruth Wakefield, owner of the Toll House Inn in Whitman, Massachusetts, first created this iconic treat. Ruth originally intended to create a chocolate butter drop cookie, but when she added chopped-up pieces of semi-sweet chocolate, she inadvertently stumbled upon a sensation that would change the dessert landscape forever. As the cookies baked, the chocolate melted into gooey pockets of bliss, and thus the chocolate chip cookie was born.
Since then, this cookie has transcended generations and cultures, becoming a staple in homes worldwide. Each bite of a chocolate chip cookie offers a delightful combination of sweet and salty, chewy and crisp, with bursts of chocolate that dance on the palate. From classic recipes to modern twists that incorporate various flavors and ingredients, chocolate chip cookies have become a canvas for culinary creativity, allowing bakers to experiment and innovate.
What sets the “Heavenly Cookie Bliss” recipe apart from the rest is its meticulous balance of sweetness, texture, and flavor. The combination of high-quality ingredients and precise measurements creates a cookie that is soft and chewy on the inside, with just the right amount of crunch on the outside. It’s this perfect harmony that takes a simple chocolate chip cookie and transforms it into a heavenly delight.
Ingredients Breakdown
Creating the ultimate chocolate chip cookie involves understanding the role each ingredient plays in the final product. Here’s a closer look at the essential components that make up the “Heavenly Cookie Bliss” recipe.
All-Purpose Flour
The backbone of any cookie dough, all-purpose flour provides the necessary structure. It contains a balanced amount of protein and gluten-forming capabilities, which helps to create a chewy texture while still allowing for some tenderness. The right amount of flour is critical; too much can lead to a dry cookie, while too little can result in a cookie that spreads too much during baking.
Baking Soda
Baking soda is a leavening agent that helps the cookies rise, creating that delightful soft texture. When combined with the acidity of brown sugar (a key ingredient in this recipe), it produces carbon dioxide, which gives the cookies their signature lift. This not only helps achieve the desired texture but also contributes to the overall flavor profile of the cookie.
Unsalted Butter
The choice of fat in cookie recipes can dramatically affect flavor and texture, and unsalted butter is the preferred option for this recipe. It adds richness and depth to the cookies, while its fat content helps to create a tender crumb. Additionally, using unsalted butter allows for better control over the overall saltiness of the final cookie, ensuring that the sweet and salty flavors are perfectly balanced.
Granulated vs. Brown Sugar
This recipe calls for a combination of granulated sugar and brown sugar, each contributing unique characteristics. Granulated sugar helps cookies spread and creates a crisp texture, while brown sugar, which contains molasses, adds moisture and a chewy quality. The interplay between these sugars creates a harmonious balance; the resulting cookie is both tender and crisp, with a depth of flavor that keeps you coming back for more.
Salt
While it may seem like a minor ingredient, salt plays a crucial role in enhancing the overall flavors in cookies. It helps to balance the sweetness from the sugars and elevates the chocolate flavor. The right amount of salt can transform a good cookie into a great one, providing a savory contrast that accentuates the sweetness.
Vanilla Extract
Pure vanilla extract is essential for depth of flavor in cookies. It provides a warm, aromatic sweetness that complements the chocolate and enhances the overall taste. While imitation vanilla may be more affordable, it lacks the complexity and richness of pure vanilla, making it a less desirable option for this recipe.
Eggs
Eggs are vital for binding the ingredients together and providing moisture to the cookie dough. They contribute to the cookie’s structure and chewiness, ensuring that each cookie holds together beautifully. This recipe typically uses one large egg, which also contributes to the rich flavor and overall texture.
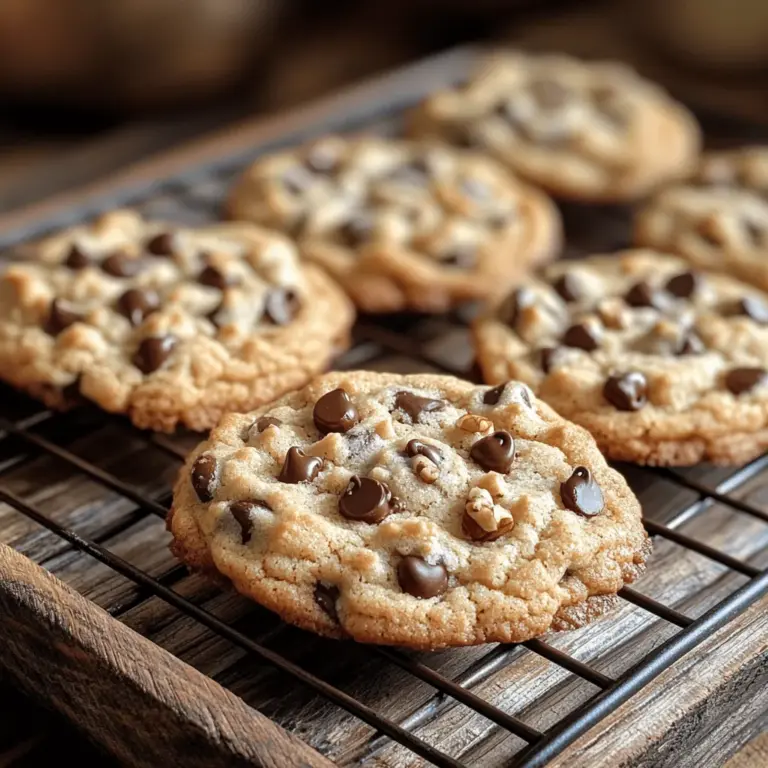
Chocolate Chips
The star of the show, chocolate chips, are what make these cookies indulgent and irresistible. Selecting the right type of chocolate is crucial; semi-sweet chocolate chips are a classic choice, striking a perfect balance between sweetness and cocoa flavor. For a twist, you might consider using dark chocolate chips, milk chocolate chips, or a mix of various types for a more complex flavor profile.
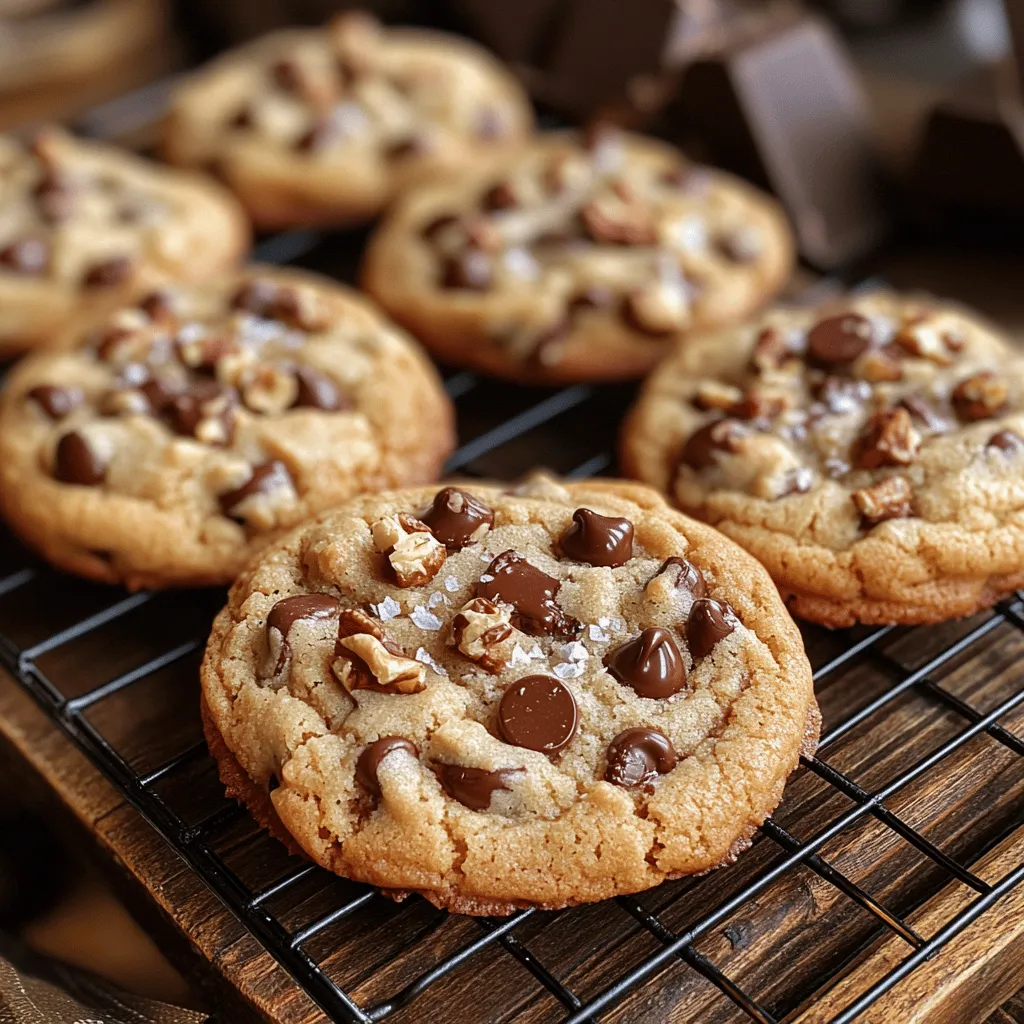
Walnuts (Optional)
While walnuts are optional in this recipe, they add a delightful crunch and a nutty flavor that pairs beautifully with the chocolate. If you choose to include them, be sure to chop them into smaller pieces to ensure even distribution in the cookie dough. However, for those who prefer a nut-free version, these cookies are just as delicious without them.
Instructions for Perfect Cookies
Now that you have a comprehensive understanding of the ingredients that will create your “Heavenly Cookie Bliss,” it’s time to delve into the step-by-step process of making these delectable treats. Following these instructions carefully will ensure that your cookies turn out perfectly every time.
1. Preheat Your Oven: Begin by preheating your oven to 350°F (175°C). This is a crucial step as it ensures that your cookies bake evenly and develop a delicious golden-brown crust.
2. Prepare Your Baking Sheets: Line two baking sheets with parchment paper. This not only helps prevent sticking but also makes for easy cleanup. Alternatively, you can use silicone baking mats if you prefer.
3. Cream the Butter and Sugars: In a large mixing bowl, combine the softened unsalted butter, granulated sugar, and brown sugar. Using an electric mixer or a whisk, cream the mixture together until it becomes light and fluffy. This process, which should take about 2-3 minutes, incorporates air into the butter, creating a lighter texture in the finished cookie.
4. Add the Egg and Vanilla: Once the butter and sugars are well combined, add in the large egg and pure vanilla extract. Mix until the ingredients are fully incorporated, scraping down the sides of the bowl as necessary. The mixture should be smooth and creamy.
5. Combine the Dry Ingredients: In a separate bowl, whisk together the all-purpose flour, baking soda, and salt. This step ensures that the leavening agent is evenly distributed throughout the flour, preventing any pockets of baking soda in the final dough.
6. Incorporate the Dry Ingredients: Gradually add the dry ingredient mixture to the wet ingredients, mixing until just combined. Be careful not to overmix, as this can lead to tough cookies. The dough should be soft and slightly sticky.
7. Fold in the Chocolate Chips and Walnuts: Gently fold in the chocolate chips and, if using, the chopped walnuts. Make sure they are evenly distributed throughout the dough for a perfect chocolate chip in every bite.
As you prepare to bake your cookies, take a moment to appreciate the delightful aromas and textures of the dough. This is the beginning of your journey to creating the “Heavenly Cookie Bliss,” and with each step, you’ll be one step closer to indulging in these delectable treats.
Stay tuned for the subsequent steps, where we’ll outline the baking process, cooling methods, and tips to ensure your cookies turn out perfectly every time.
Preheating the Oven: Importance of Temperature Control
Before you embark on the delightful journey of baking your Heavenly Cookie Bliss, preheating your oven is crucial. The ideal baking temperature for cookies is typically set at 350°F (175°C). Proper temperature control ensures that your cookies bake evenly, resulting in a perfect texture. An oven that’s too cool can lead to overly soft cookies, while an overly hot oven can cause them to burn on the outside before the insides are cooked through. Always allow your oven to preheat fully before placing your cookie sheets inside; this simple step can make a significant difference in the final product.
Mixing Dry Ingredients: Why It Matters for Even Texture
Now that your oven is preheating, it’s time to focus on the dry ingredients. In a separate bowl, combine flour, baking powder, baking soda, and a pinch of salt. Mixing these dry ingredients thoroughly before incorporating them into the wet mixture is essential. This process helps to ensure that the leavening agents are evenly distributed throughout the flour, preventing any pockets of baking soda or powder from forming in your cookies. An even texture is key to achieving that delightful bite you expect from a perfect cookie.
Creaming Butter and Sugars: The Science Behind Achieving Fluffiness
Next, it’s time to cream together the softened butter and sugars. Using a stand mixer or a hand mixer, beat the butter until it’s light and fluffy. This process introduces air into the butter, which will help your cookies rise and maintain a soft texture. The sugar granules create tiny air pockets in the butter, and the more you cream, the fluffier your cookies will be. Be patient during this step, as this is where the magic begins. Aim for a pale, creamy mixture that doubles in volume—this is the sign of success.
The Role of Eggs and Vanilla: Achieving the Perfect Batter Consistency
Once your butter and sugars are perfectly creamed, it’s time to add the eggs and vanilla extract. The eggs play a vital role in binding the ingredients together. They provide moisture and help the cookies rise, contributing to their chewy texture. Make sure to add the eggs one at a time, mixing well after each addition. The vanilla extract not only enhances the flavor but also adds richness to the batter. Mixing these ingredients until just combined will help achieve the ideal consistency for your cookie dough.
Combining Mixtures: Tips for Avoiding Overmixing
Now that your wet ingredients are ready, it’s time to combine them with the dry mixture. Gently fold the dry ingredients into the wet ones using a spatula or wooden spoon. It’s crucial to do this step carefully to avoid overmixing, which can lead to tough cookies. Overmixing develops gluten in the flour, resulting in a denser cookie—definitely not the light, fluffy texture we’re aiming for. Mix until you see no dry flour but be careful not to overdo it.
Folding in Chocolate Chips and Walnuts: Ensuring Even Distribution
Once your dough is perfectly mixed, it’s time to fold in the star ingredients: chocolate chips and walnuts. Using a spatula, gently incorporate these add-ins, ensuring they are evenly distributed throughout the dough. This step is essential for ensuring every bite of your cookie is packed with deliciousness. If you prefer, you can customize your cookie by substituting walnuts with pecans or omitting nuts altogether for a nut-free version.
Scooping the Dough: Importance of Portion Size for Uniform Baking
With your dough ready, it’s time to scoop it onto a baking sheet. Using a cookie scoop or a tablespoon, portion out the dough into uniform balls. Aim for about 1.5 tablespoons per cookie, as this size allows for even baking and a satisfying bite. Make sure to leave adequate space between each cookie on the baking sheet, as they will spread while baking. For an even more professional look, roll the dough balls in your hands to create a smooth surface.
Baking: How to Know When Cookies Are Done
Once your cookies are scooped and ready to go, place them in the preheated oven. Bake for about 10-12 minutes, but keep an eye on them! The edges should be golden brown, while the centers may still look a bit soft. This is perfect, as the cookies will continue to firm up as they cool. You can also perform the “poke test”: gently press the center of a cookie with your finger; if it springs back, they’re ready to come out.
Cooling Process: Best Practices for Texture and Taste
After removing the cookies from the oven, let them cool on the baking sheet for about 5 minutes. This resting time allows them to set and makes transferring them easier. Then, use a spatula to move them to a wire rack to cool completely. This step is crucial for achieving the right texture—allowing cookies to cool on a rack prevents them from becoming soggy and helps them maintain that perfect chewy center with crisp edges.
Serving Suggestions and Pairings
Once your Heavenly Cookie Bliss cookies have cooled, it’s time to enjoy them! Here are some delightful ways to savor these treats:
1. Milk, Coffee, or Tea Pairings: These cookies pair beautifully with a glass of cold milk, enhancing the chocolate flavor and providing a nostalgic experience. If you’re a coffee lover, try them with a rich espresso or a creamy latte for a delightful contrast. For tea enthusiasts, a warm cup of chai or Earl Grey complements the sweetness perfectly.
2. Suggestions for Storing Cookies to Maintain Freshness: To keep your cookies fresh, store them in an airtight container at room temperature. For added freshness, you can place a slice of bread in the container, which helps maintain moisture. If you want to extend their shelf life, consider freezing them. Place the cookies in a freezer-safe bag, separating layers with parchment paper, and they can last up to three months.
3. Serving Ideas for Gatherings or Events: These cookies are perfect for gatherings or as a thoughtful gift. Serve them on a decorative platter at parties, or package them in a cute tin as a homemade gift for friends and family. For special occasions, consider creating a cookie bar where guests can choose their favorite toppings and add them to their cookies.
Nutritional Information
Understanding the nutritional value of your Heavenly Cookie Bliss cookies is essential, especially if you’re mindful of your dietary intake. Each cookie, based on a standard recipe yielding approximately 24 cookies, contains about:
– Calories: 150-200
– Sugars: 10-12 grams
– Fats: 7-9 grams
For those looking for healthier alternatives, consider these swaps:
– Gluten-Free Options: Substitute all-purpose flour with a gluten-free blend to make the cookies suitable for those with gluten sensitivities.
– Sugar Alternatives: Use coconut sugar or a natural sweetener like honey or maple syrup for a lower glycemic index.
– Lower Fat Options: Replace some of the butter with unsweetened applesauce or Greek yogurt to reduce fat content while maintaining moisture.
Conclusion
Baking your own batch of Heavenly Cookie Bliss cookies is not just about satisfying a sweet tooth; it’s about creating joy and sharing love with those around you. The process of mixing, baking, and enjoying these cookies is a wonderful way to connect with friends and family, creating lasting memories in the kitchen.
Don’t hesitate to experiment with this recipe! Add your favorite mix-ins, adjust the sweetness, or even try different flavors of extracts to make it uniquely yours. Baking is an art, and every batch is a chance to express your creativity. So grab your mixing bowl, gather your loved ones, and embark on this delicious adventure together—because the experience of homemade cookies is a joy that should be shared and cherished.
