Introduction
In a world where health-conscious eating is becoming increasingly important, finding snacks that are both nutritious and delicious can often feel like a challenge. Enter Nutty Banana Bliss Bars—an easy-to-make, wholesome treat that checks all the boxes. These bars are not only packed with flavor but also serve as a great source of energy, making them the perfect solution for busy families, athletes, or anyone looking to indulge in a guilt-free snack.
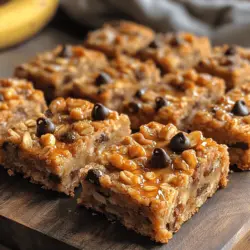
Nutty Banana Bliss Bars are a delightful combination of ripe bananas, oats, and nut butter, making them rich in essential nutrients while providing a satisfying sweetness. They can be enjoyed at any time of the day, whether as a quick breakfast, a mid-afternoon pick-me-up, or a post-workout refuel. Moreover, their versatility allows for endless variations, accommodating different tastes and dietary preferences.
This recipe is particularly appealing to health-conscious individuals and families who are eager to incorporate more wholesome ingredients into their diets without sacrificing flavor. With the right balance of carbohydrates, healthy fats, and protein, Nutty Banana Bliss Bars are a smart choice for anyone aiming to maintain a healthy lifestyle while still enjoying sweet treats.
Nutritional Benefits of Nutty Banana Bliss Bars
Understanding the health benefits of the ingredients used in Nutty Banana Bliss Bars can elevate your appreciation for this simple yet nutrient-dense recipe. Let’s dive into the key components that make these bars not only delicious but also beneficial for your health:
Ripe Bananas
Ripe bananas are a star ingredient in this recipe. They provide natural sweetness, allowing you to reduce added sugars without compromising on flavor. Bananas are also an excellent source of potassium, which is essential for heart health and muscle function. Their high fiber content aids in digestion and helps you feel full longer, making them an ideal base for a healthy snack.
Rolled Oats
Rolled oats are another fundamental ingredient in Nutty Banana Bliss Bars. Unlike instant oats, which can often be processed and stripped of their nutritional value, rolled oats retain their whole grain goodness. They are high in soluble fiber, which is beneficial for heart health as it can help lower cholesterol levels. Additionally, oats are known for their ability to stabilize blood sugar levels, making them a smart choice for sustained energy throughout the day.
Peanut Butter
Peanut butter contributes a rich, creamy texture and a satisfying flavor to the bars. It is also a great source of protein and healthy fats, which are essential for muscle repair and energy. When choosing peanut butter, look for options with minimal added sugars and oils for the healthiest choice. Whether creamy or crunchy, peanut butter enhances the nutritional profile of these bars while providing a delicious nutty flavor.
Honey or Maple Syrup
When it comes to sweetening these bars, honey and maple syrup are natural alternatives to refined sugars. Both options bring their own unique flavor profiles—honey offers a floral sweetness, while maple syrup adds a rich, caramel-like taste. These natural sweeteners also come with some health benefits; honey has antibacterial properties and can soothe a sore throat, while maple syrup contains antioxidants and minerals like manganese and zinc.
Cinnamon
Adding cinnamon not only enhances the flavor of the bars but also provides potential health benefits. This spice is known for its anti-inflammatory properties and can help regulate blood sugar levels. A sprinkle of cinnamon can transform the taste of your Nutty Banana Bliss Bars, making them even more enjoyable.
Optional Ingredients: Nuts and Chocolate Chips
For those looking to boost the nutritional content further, consider adding nuts or dark chocolate chips. Nuts provide additional healthy fats, protein, and crunch, while dark chocolate can satisfy your sweet cravings and offer antioxidants. Both options can be tailored to your personal taste and dietary needs, making this recipe adaptable for everyone.
Ingredients Breakdown
To create the perfect Nutty Banana Bliss Bars, it’s important to understand each ingredient’s role in the recipe. Below is a detailed look at the primary components you’ll need to make these nutritious bars:
Mashed Bananas
The foundation of your Nutty Banana Bliss Bars begins with ripe bananas. The level of ripeness directly affects both the sweetness and texture of the bars. Choose bananas that are speckled with brown spots, as this indicates they are at their sweetest. When mashed, they will blend seamlessly with the other ingredients, providing moisture and natural sweetness.
Rolled Oats
When selecting oats for this recipe, opt for rolled oats over instant oats. Rolled oats have been steamed and flattened, allowing them to retain their whole grain benefits. They provide a hearty texture that holds the bars together while delivering essential nutrients. Instant oats, on the other hand, are more processed and can lead to a mushy texture in baked goods.
Peanut Butter
Peanut butter adds creaminess, flavor, and essential nutrients to the bars. When choosing peanut butter, you have the option of creamy or crunchy varieties. Creamy peanut butter creates a smooth texture, while crunchy peanut butter adds delightful bits of peanuts for added crunch. Be sure to select a natural peanut butter without added sugars, oils, or preservatives for the healthiest choice.
Honey vs. Maple Syrup
Both honey and maple syrup serve as natural sweeteners in this recipe, each bringing distinct flavors to the table. Honey offers a vibrant sweetness that pairs well with bananas and oats, while maple syrup contributes a deeper, more complex flavor. When selecting between the two, consider personal preference and any dietary restrictions, as honey is not vegan-friendly, while maple syrup is.
Vanilla Extract and Cinnamon
Vanilla extract is a key ingredient for flavor enhancement, adding warmth and depth to the Nutty Banana Bliss Bars. Use pure vanilla extract for the best flavor. Similarly, cinnamon not only complements the sweetness of the bananas but also adds a hint of warmth that makes these bars even more enjoyable.
Salt
Although it may seem counterintuitive, a pinch of salt is essential in balancing sweetness. It enhances the flavors of the other ingredients, making the bars taste even more delicious. The right amount of salt can elevate your recipe from good to exceptional.
Step-by-Step Instructions
With a clear understanding of the ingredients, you’re ready to embark on the journey of making Nutty Banana Bliss Bars. Here are the initial steps to kick off your baking adventure:
Preheat the Oven
The first step in making Nutty Banana Bliss Bars is preheating your oven to 350°F (175°C). This is crucial for ensuring an even bake and achieving the perfect texture. Preheating helps the bars rise properly, creating a soft yet firm consistency that makes them easy to cut and enjoy.
Prepare the Baking Dish
Next, prepare your baking dish for optimal results. Line an 8×8-inch baking pan with parchment paper, leaving some overhang on the sides. This will help you easily lift the bars out once they are baked and cooled. Additionally, lightly grease the parchment paper with cooking spray or a small amount of oil to prevent sticking, ensuring every bite of your Nutty Banana Bliss Bars comes out intact.
Now that you have set the stage for your Nutty Banana Bliss Bars, you’re well on your way to creating a delicious and nutritious snack that the whole family will love. Stay tuned for the next steps, where we’ll guide you through combining the ingredients and baking these delightful bars to perfection.
Mixing the Wet Ingredients: Techniques for Achieving a Smooth Consistency
To create the perfect Nutty Banana Bliss Bars, the first step begins with mixing the wet ingredients. Achieving a smooth consistency is essential for the overall texture of your bars. Start by using ripe bananas; their natural sweetness and moisture will contribute significantly to the batter. When mashing the bananas, use a fork or a potato masher to break them down until they are smooth but not overly pureed. Aim for a chunky consistency that still has some banana pieces; this will provide delightful bursts of flavor in your bars.
After mashing, add in the nut butter of your choice—peanut butter, almond butter, or cashew butter all work wonderfully. For a creamy blend, consider warming the nut butter slightly in the microwave for about 10-15 seconds. This will make it easier to mix and help it incorporate better with the bananas. Finally, whisk in the eggs and vanilla extract, ensuring everything is well combined and smooth. This mixture serves as the foundation for your Nutty Banana Bliss Bars, so take your time to ensure it’s perfectly blended.
Tips for Mashing Bananas Effectively
When it comes to mashing bananas, technique matters. Here are some tips to ensure that you achieve the best results:
1. Choose Ripe Bananas: The riper the bananas, the easier they are to mash. Look for bananas with brown spots, as they’re sweeter and more flavorful.
2. Use the Right Tool: A fork or potato masher works best. Avoid using a blender or food processor, as this can create a puree rather than a chunky mash, which is ideal for this recipe.
3. Mash in a Bowl: Use a large mixing bowl to give you enough space to mash thoroughly without making a mess.
4. Leave Some Texture: While you want a smooth mixture, leaving small chunks of banana will enhance the texture of your bars, providing delightful bites throughout.
Incorporating Dry Ingredients: How to Mix Without Overworking the Dough
Once your wet ingredients are perfectly blended, it’s time to incorporate the dry ingredients. In a separate bowl, mix together the flour, oats, baking powder, baking soda, and salt. When adding the dry mixture to the wet mixture, do so gradually, folding it in gently rather than stirring vigorously. This technique prevents overworking the dough, which can result in denser bars.
Use a spatula or wooden spoon to combine the ingredients. Fold the flour mixture into the wet ingredients until just combined. It’s okay if there are a few streaks of flour remaining; overmixing can lead to tough bars. The goal is to reach a homogenous mixture without losing the light texture that makes these bars so delightful.
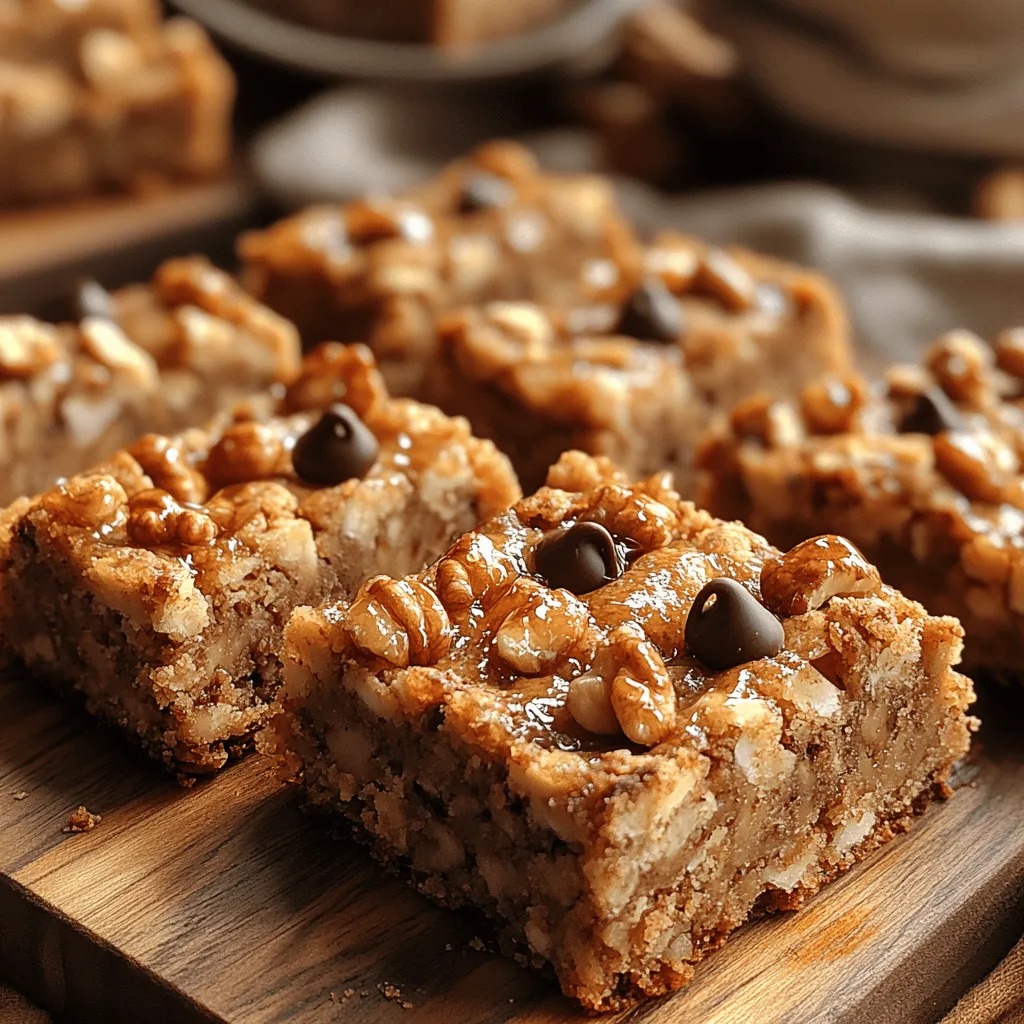
Discussion on the Benefits of Folding in Chocolate Chips and Nuts
One of the highlights of Nutty Banana Bliss Bars is the addition of chocolate chips and nuts. When folding these ingredients into the batter, do so gently to ensure they are evenly distributed without breaking them down.
The chocolate chips add a rich sweetness and a touch of indulgence, making the bars more appealing, especially to kids. On the other hand, the nuts—whether you’re using walnuts, pecans, or almonds—offer a satisfying crunch and healthy fats. Nuts are packed with nutrients, including protein, fiber, and essential vitamins, which contribute to the overall health benefits of the bars. This combination of creamy, sweet chocolate and crunchy nuts creates a wonderful contrast that elevates the flavor profile.
Transferring to Baking Dish: Techniques for Compacting the Mixture for Even Baking
Once your batter is ready, it’s time to transfer it into a baking dish. Line an 8×8 inch or 9×9 inch baking dish with parchment paper for easy removal later. Pour the mixture into the prepared dish and use a spatula to spread it evenly across the bottom. To ensure even baking, it’s important to compact the mixture.
Press down firmly but gently with the spatula, ensuring that the mixture is level and compact. This helps the bars to hold their shape during baking and prevents them from crumbling. The more compact the mixture, the better the bars will hold together once baked.
Baking Process: What to Look for to Determine Doneness
Preheat your oven to 350°F (175°C) before you start mixing your ingredients. Once your Nutty Banana Bliss Bars are in the oven, they will need to bake for approximately 25-30 minutes. To determine if they are done, look for a few key indicators:
1. Color: The top should turn a golden brown, signaling that they are cooked through.
2. Toothpick Test: Insert a toothpick into the center of the bars. If it comes out clean or with a few moist crumbs (not wet batter), your bars are ready.
3. Firmness: Gently press the center of the bars with your finger. They should feel firm and spring back slightly.
Avoid overbaking, as this can lead to dry bars. Once they are done, remove them from the oven and let them cool in the dish for about 10 minutes before transferring them to a wire rack to cool completely.
Importance of Cooling Before Slicing to Maintain Structure
Cooling your Nutty Banana Bliss Bars before slicing is crucial. If you cut them too soon, they may crumble and lose their beautiful shape. Allow the bars to cool in the baking dish for about 10 minutes, then lift them out using the parchment paper and let them cool on a wire rack for an additional 20-30 minutes. This cooling period allows the bars to set, making them easier to slice and giving them a firmer texture.
Once cooled, use a sharp knife to slice the bars into squares or rectangles. The cooling process not only improves their structure but also enhances the flavors as they meld together.
Serving Suggestions and Pairings
Nutty Banana Bliss Bars are incredibly versatile and can be enjoyed on various occasions. They make for an ideal breakfast option when you need something quick and nutritious. Pair them with a dollop of Greek yogurt or a side of fresh fruit for a well-rounded meal.
For snack time, these bars are perfect for both kids and adults. They can be packed into lunchboxes or grabbed on the go. Consider serving them with a cup of tea or coffee to elevate your afternoon break.
For dessert, these bars can be served warm with a scoop of vanilla ice cream or a sprinkle of powdered sugar on top. Their sweetness pairs beautifully with a rich cup of dark roast coffee or a refreshing herbal tea.
Storage and Shelf Life
To maintain the freshness of your Nutty Banana Bliss Bars, proper storage is key. Here are some best practices:
1. Airtight Containers: Store the bars in an airtight container at room temperature for up to a week. This keeps them moist and flavorful.
2. Refrigeration: If you prefer, you can refrigerate them for longer shelf life. They will stay fresh for about two weeks in the fridge.
3. Freezing for Long-Term Storage: If you want to prepare a batch in advance, these bars freeze exceptionally well. Wrap individual bars in plastic wrap or place them in a freezer-safe container. They can last for up to three months in the freezer. Just be sure to thaw them overnight in the refrigerator before enjoying.
Customizing Your Bars
One of the best aspects of Nutty Banana Bliss Bars is their adaptability. You can easily customize the recipe to suit your taste preferences or dietary needs. Here are some suggestions:
1. Alternative Nut Butters: If you’re not a fan of peanut butter, try almond or cashew butter. Each variety brings a unique flavor and texture to the bars.
2. Adding Dried Fruits or Seeds: For an added burst of flavor, consider folding in dried cranberries, raisins, or seeds like chia or flax. These additions not only enhance the taste but also boost the nutritional profile.
3. Spices for Flavor Profiles: Experiment with spices to create different flavor profiles. A pinch of nutmeg or ginger can add warmth, while cinnamon can enhance the overall sweetness.
4. Vegan Options: Replace eggs with flax eggs (1 tablespoon of ground flaxseed mixed with 2.5 tablespoons of water per egg) for a vegan version of these bars.
Conclusion
Nutty Banana Bliss Bars are not only a delicious treat but also a nutritious option for those looking to incorporate healthy snacks into their diet. Packed with wholesome ingredients, they offer a delightful mix of flavors and textures that everyone will enjoy. Whether you choose to savor them for breakfast, as a mid-afternoon snack, or even as a dessert option, these bars are versatile enough to fit any occasion.
We encourage you to try this recipe and experiment with different variations to make it your own. Incorporating healthy snacks like Nutty Banana Bliss Bars into your daily routine can make a significant difference in maintaining a balanced diet. So grab your ingredients, get baking, and enjoy the deliciousness of these bars!