
As the warm sun shines and the days stretch longer, there’s an undeniable craving for refreshing desserts that require minimal effort. Enter no-bake treats, a category that not only embraces ease of preparation but also delivers delightful flavors and textures. One such dessert that stands out in this realm is the Strawberry Dream Icebox Cake. This cake is the epitome of simplicity and indulgence, combining fresh strawberries, creamy textures, and a buttery graham cracker crust to create a refreshing experience that’s perfect for summer gatherings or any special occasion.
As the warm sun shines and the days stretch longer, there’s an undeniable craving for refreshing desserts that require minimal effort. Enter no-bake treats, a category that not only embraces ease of preparation but also delivers delightful flavors and textures. One such dessert that stands out in this realm is the Strawberry Dream Icebox Cake. This cake is the epitome of simplicity and indulgence, combining fresh strawberries, creamy textures, and a buttery graham cracker crust to create a refreshing experience that’s perfect for summer gatherings or any special occasion.
The allure of the Strawberry Dream Icebox Cake lies in its refreshing qualities and the ease with which it can be prepared. With just a handful of ingredients and minimal effort, you can whip up a dessert that will wow your family and friends. Key ingredients such as fresh strawberries, heavy whipping cream, cream cheese, and mascarpone contribute to its luxurious texture and flavor profile. Together, they create a dessert that’s not only visually appealing but also a treat for the palate, balancing sweetness with the natural tartness of strawberries.
In this article, we will embark on an engaging exploration of the Strawberry Dream Icebox Cake, diving into its origins, the nutritional benefits of its star ingredient—strawberries—and the essential components that make this dessert so irresistible. We’ll also provide detailed, step-by-step instructions to ensure your icebox cake turns out perfectly every time. So, roll up your sleeves and prepare to indulge in a delightful culinary adventure!
Strawberries are more than just a beautiful fruit; they are a powerhouse of nutrition and a staple in desserts around the world. Rich in vitamins, particularly vitamin C, strawberries offer a host of health benefits. They are high in antioxidants, which help combat oxidative stress and inflammation in the body. Additionally, strawberries are low in calories and high in fiber, making them a guilt-free indulgence that can satisfy your sweet tooth while contributing to your overall health.
Historically, strawberries have held a significant place in culinary traditions. Ancient Romans cultivated strawberries for their medicinal properties, while in the Middle Ages, they were considered a symbol of perfection and purity. Today, strawberries are celebrated globally for their vibrant color, unique flavor, and versatility in both sweet and savory dishes. Their natural sweetness and bright red hue make them the perfect addition to desserts, and they pair beautifully with creamy components, enhancing both flavor and visual appeal.
When used in desserts like the Strawberry Dream Icebox Cake, strawberries not only contribute their luscious flavor but also provide a refreshing contrast to the rich creaminess of the other ingredients. This combination creates a balance that is both satisfying and invigorating, making every bite a delight.
To create the perfect Strawberry Dream Icebox Cake, it’s essential to understand the role of each ingredient. Here’s a closer look at the key components that come together to make this dessert a standout:
At the heart of this icebox cake are fresh strawberries. Their juicy, sweet flavor and vibrant color are what set this dessert apart. When macerated, strawberries release their natural juices, which enhances their sweetness and creates a syrupy layer that soaks into the cake, ensuring each bite is bursting with flavor. For the best results, select ripe, in-season strawberries, as they will be the sweetest and most flavorful.
Granulated sugar plays a dual role in this recipe. First, it enhances the sweetness of the strawberries during the maceration process. By sprinkling sugar over the sliced strawberries and allowing them to sit, the sugar draws out the juices, creating a delicious syrup that will infuse the cake with flavor. Additionally, sugar contributes to the overall sweetness of the dessert, balancing the tartness of the cream cheese and mascarpone.
Heavy whipping cream is essential for achieving the light and airy texture that characterizes this icebox cake. When whipped, it transforms into soft peaks that provide a fluffy base for the filling. The richness of heavy cream complements the strawberries, adding a luxurious mouthfeel to the dessert.
Powdered sugar is used in this recipe primarily to sweeten the whipped cream and stabilize it. Unlike granulated sugar, powdered sugar dissolves quickly, ensuring a smooth and creamy texture. It also helps maintain the structure of the whipped cream, preventing it from deflating after being mixed with the other ingredients.
Vanilla extract is a flavor enhancer that adds depth to the overall taste of the cake. Its warm, aromatic notes complement the sweetness of the strawberries and the creaminess of the filling, creating a well-rounded flavor profile that delights the palate.
Graham crackers form the base of the Strawberry Dream Icebox Cake, providing a buttery crunch that contrasts beautifully with the creamy filling. They are easy to work with and create a sturdy foundation for the layers of cream and strawberries. The slight sweetness of the graham crackers also adds to the overall harmony of flavors in the dessert.
Cream cheese and mascarpone are the stars of the filling, contributing richness and creaminess that elevate the icebox cake to a new level. Cream cheese adds a tangy flavor, while mascarpone brings a smooth, velvety texture. Together, they create a luscious filling that pairs perfectly with the strawberries.
As a finishing touch, mint leaves add a refreshing burst of flavor and a pop of color to the dessert. They enhance the visual appeal and provide a fragrant contrast to the sweetness of the strawberries and cream. Mint is optional, but it’s highly recommended for those looking to elevate their icebox cake.
The process of making the Strawberry Dream Icebox Cake begins with the preparation of the strawberries. This is a crucial step, as it greatly influences the flavor of the final dessert.
1. Select Ripe Strawberries: Begin by selecting fresh, ripe strawberries. Look for ones that are bright red, firm, and fragrant. Avoid any strawberries that are bruised or overly soft, as these may not provide the best flavor.
2. Wash and Hull the Strawberries: Rinse the strawberries under cold water to remove any dirt or pesticides. Then, hull the strawberries by removing the green tops and the white core. This will ensure a smooth texture when blended or layered.
3. Slice the Strawberries: Once hulled, slice the strawberries into thin pieces. Aim for uniform thickness to ensure even distribution throughout the cake.
4. Macerate the Strawberries: Place the sliced strawberries in a bowl and sprinkle granulated sugar over them. The amount of sugar can vary depending on the sweetness of the strawberries, but a good starting point is about one to two tablespoons. Gently toss the strawberries to coat them in the sugar, then let them sit for about 15 to 30 minutes. This allows the sugar to draw out the natural juices, creating a delicious, syrupy mixture that will enhance the flavor of the cake.
The next step is to prepare the whipped cream, which will serve as the backbone of the Strawberry Dream Icebox Cake.
1. Chill Your Equipment: For the best results, chill your mixing bowl and beaters in the freezer for 10 to 15 minutes before whipping the cream. This helps the cream whip up faster and increases its volume.
2. Combine the Heavy Cream and Sugar: In the chilled mixing bowl, pour in the heavy whipping cream. Add powdered sugar for sweetness, along with a splash of vanilla extract for flavor. The ratio of heavy cream to sugar typically ranges from 1 cup of cream to 2 to 4 tablespoons of sugar, depending on your desired sweetness.
3. Whip the Cream: Using an electric mixer, begin whipping the cream on medium speed. As the cream thickens, gradually increase the speed to high. Watch closely for soft peaks to form—this means the cream is light and fluffy but still holds its shape. Be careful not to overwhip, as this can lead to a grainy texture.
4. Stabilize the Whipped Cream: If desired, you can add a stabilizing agent at this point, such as a tablespoon of cornstarch or gelatin dissolved in a small amount of water. This will help the whipped cream maintain its structure when layered with the other ingredients.
Now that you’ve prepared the strawberries and whipped cream, you’re well on your way to assembling the Strawberry Dream Icebox Cake. In the next section, we will delve into the assembly process, where the magic truly happens, and you’ll see how these components come together to create a stunning and delicious dessert. Stay tuned for the final steps that will transform your ingredients into a show-stopping Strawberry Dream Icebox Cake!
Creating the perfect whipped cream is essential for your Strawberry Dream Icebox Cake; it provides the light and airy texture that balances the richness of the cream cheese mixture. To achieve this without over-whipping, begin by chilling your mixing bowl and beaters in the refrigerator for about 15 minutes before use. This keeps the cream cold, allowing it to whip more efficiently.
When you start whipping the cream, use medium speed and gradually increase to high as it begins to thicken. It’s critical to keep a watchful eye on the cream as it whips. Look for soft peaks first—this means the cream will slightly hold its shape but still have a soft, flowing texture. Once it reaches this stage, reduce the speed to low and add your sugar and vanilla extract. This helps incorporate the sweetener without deflating the cream.
Continue beating until you see firm peaks, but stop just before it turns grainy or curdled. The cream should be smooth and glossy, with a velvety texture. Remember, it’s easier to add more cream if you’ve under-whipped than to salvage over-whipped cream, so err on the side of caution.
For the cream cheese layer, using room temperature cream cheese is crucial for achieving a smooth and creamy consistency. If your cream cheese is cold, it can lead to lumps in your mixture, which will affect the overall texture of the cake. To prepare the cream cheese mixture, beat the softened cream cheese in a large bowl until it’s light and fluffy. This usually takes about 2 to 3 minutes.
Next, add powdered sugar gradually to the cream cheese, mixing until fully combined. Follow this by gently folding in the whipped cream you prepared earlier. The key here is to use a spatula and employ a gentle folding motion to maintain the airy texture of the whipped cream while incorporating it into the cream cheese mixture. This will ensure that your cake has a light, fluffy consistency, rather than a dense one.
Layering is where your Strawberry Dream Icebox Cake truly comes to life. Start with a layer of graham crackers at the bottom of your baking dish. Ensure they are evenly spaced and cover the entire base. Next, spoon a portion of the cream cheese mixture over the graham crackers, spreading it out evenly with a spatula.
Now, add a layer of fresh strawberries, either sliced or whole, depending on your preference. For the best presentation, choose ripe, vibrant strawberries, as they add color and flavor to your cake. Repeat the process of adding graham crackers, cream cheese mixture, and strawberries until you reach the top of your baking dish, finishing with a layer of the cream cheese mixture.
Visual cues to look for during the layering process include ensuring that each layer is even and that the strawberries are distributed well. This not only enhances the visual appeal but also ensures that every slice of cake has a balanced flavor.
Chilling the cake is a crucial step that should not be skipped. Once your cake is assembled, cover it with plastic wrap or aluminum foil and place it in the refrigerator for at least 4 hours, though overnight is preferred. Chilling allows the flavors to meld and the graham crackers to soften, creating a creamy and cohesive texture. This step is essential for a successful icebox cake, as it allows the dessert to set properly, making it easier to slice and serve.
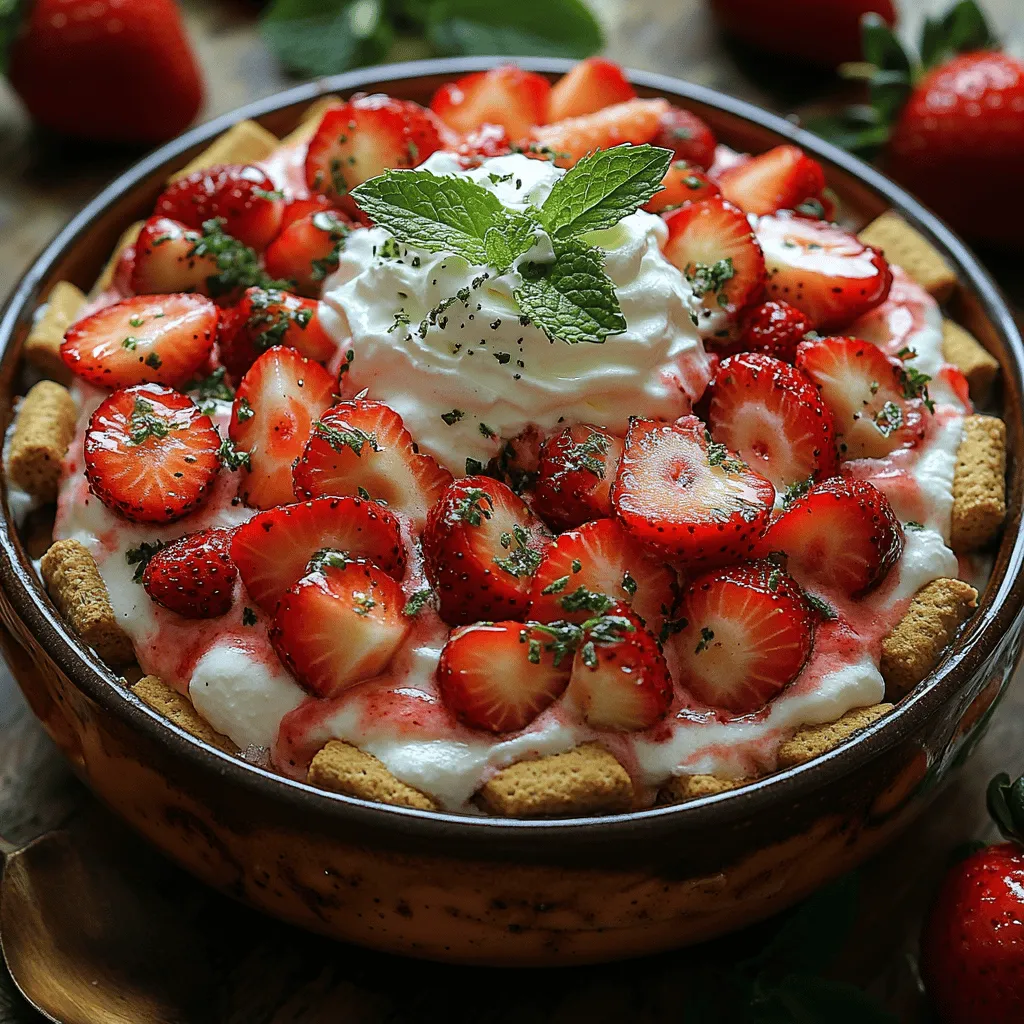
Garnishing your Strawberry Dream Icebox Cake can elevate its presentation and entice your guests. One simple yet elegant way to garnish is by adding a few whole strawberries on top, perhaps halving some for visual interest. Fresh mint leaves can also add a pop of color and a refreshing aroma. Consider drizzling a light strawberry sauce or pureé around the plate for an added touch of elegance.
For serving suggestions, this cake is perfect for various occasions, from summer picnics to birthday parties and holiday gatherings. It can be served as a refreshing dessert on a warm day or as a sweet treat at a festive celebration. Pair it with a dollop of whipped cream or a scoop of vanilla ice cream for an indulgent experience.
When it comes to beverages that complement the Strawberry Dream Icebox Cake, consider serving a chilled glass of sparkling lemonade or a light rosé wine. The fruity notes of the wine or the tartness of the lemonade pair beautifully with the sweetness of the strawberries and cream.
One of the greatest appeals of the Strawberry Dream Icebox Cake is its versatility. While strawberries are the star of this recipe, you can easily adapt it to feature seasonal fruits. For a summer twist, consider using peaches or blueberries, while autumn might inspire you to incorporate apples or pears. Adjust the flavor profile by adding a hint of lemon zest, almond extract, or even a splash of liqueur to the cream cheese mixture for an adult version.
For those with dietary restrictions, this recipe can be adapted to suit various needs. Gluten-free graham crackers can replace traditional ones, and you can use dairy-free cream cheese and whipped cream for a vegan version. Simply ensure that all ingredients align with your dietary preferences.
The beauty of this recipe lies in its encouragement to experiment. Don’t hesitate to try different fruit combinations or flavor infusions. The kitchen is a canvas, and the Strawberry Dream Icebox Cake is an excellent starting point for your culinary creativity.
The Strawberry Dream Icebox Cake is a delightful, no-bake dessert that perfectly marries the freshness of strawberries with the creaminess of whipped cream and cream cheese. Its simplicity allows you to enjoy the process of making it while also impressing your guests with its beautiful presentation and delicious taste.
As you gather your ingredients and begin crafting this dessert, remember that cooking is not just about following a recipe; it’s about the joy of creating something delicious and sharing it with those you love. This icebox cake is more than just a dessert—it’s a sweet way to celebrate special moments or simply enjoy a sunny day. So, roll up your sleeves, gather your strawberries, and dive into the delightful experience of making your own Strawberry Dream Icebox Cake. Enjoy every moment of the process, and savor the delicious results!
Crispy Halloumi Taco Lettuce Wraps: A Flavorful Plant-Based Delight In recent years, the culinary landscape…
Creamy Avocado Deviled Eggs with Crunchy Bacon Deviled eggs have long been a staple of…
Introduction: The Delight of Morning Bliss Baked French Toast Muffin Tins Start your day with…
Grilled Watermelon Feta Skewers: A Refreshing Summer Delight When it comes to grilling, most people…
Creamy Roasted Corn Fettuccine: A Comforting Culinary Delight When it comes to comfort food, few…
Introduction: Discovering the Joy of Air Fryer Cooking In recent years, air fryers have revolutionized…


